There are a variety of steps that go into my creative routine as a travel photographer. Bringing the photos to life involves many facets. From researching the location, making a mood board for inspiration, taking the images, editing, and finally posting the photos. This article will dive into my creative process from start to finish as I take my photos on my travels.
Disclaimer: This post may contain affiliate links, which means I get a small commission if you make a purchase (at no extra cost to you). It’s one of the ways I can keep producing free resources and guides for my readers. Thank you for your support! Refer to the Disclosure Policy for more details.
Research & Planning
You can’t just show up to a location to get some great photos.
Let me tell you a secret that not many people know about. A lot of the stunning images you see on social media are actually very planned. From the location, the composition, the time of day, and how the light is hitting the scene. With this in mind, I recommend researching the location as much as possible.
What should I research for photos?
Here are some research considerations…
- Is this location accessible by car, hiking, backpacking, etc? What gear will I need?
- What is the best time to visit?
- When is sunrise or sunset at the location? You’ll need to get to the location in advance to set up all your gear and find the composition you want to capture.
- What will the subject wear? Consider the colours of the outfit in the location. Will they contrast against the background?
Examples: Select your Outfits
If I’m visiting a location that has limited lighting I often wear lighter and bright colours. This is so I can contrast with the background to make me stand out as the subject. The same logic works with a background that has light colours where it would make sense to wear darker colours.
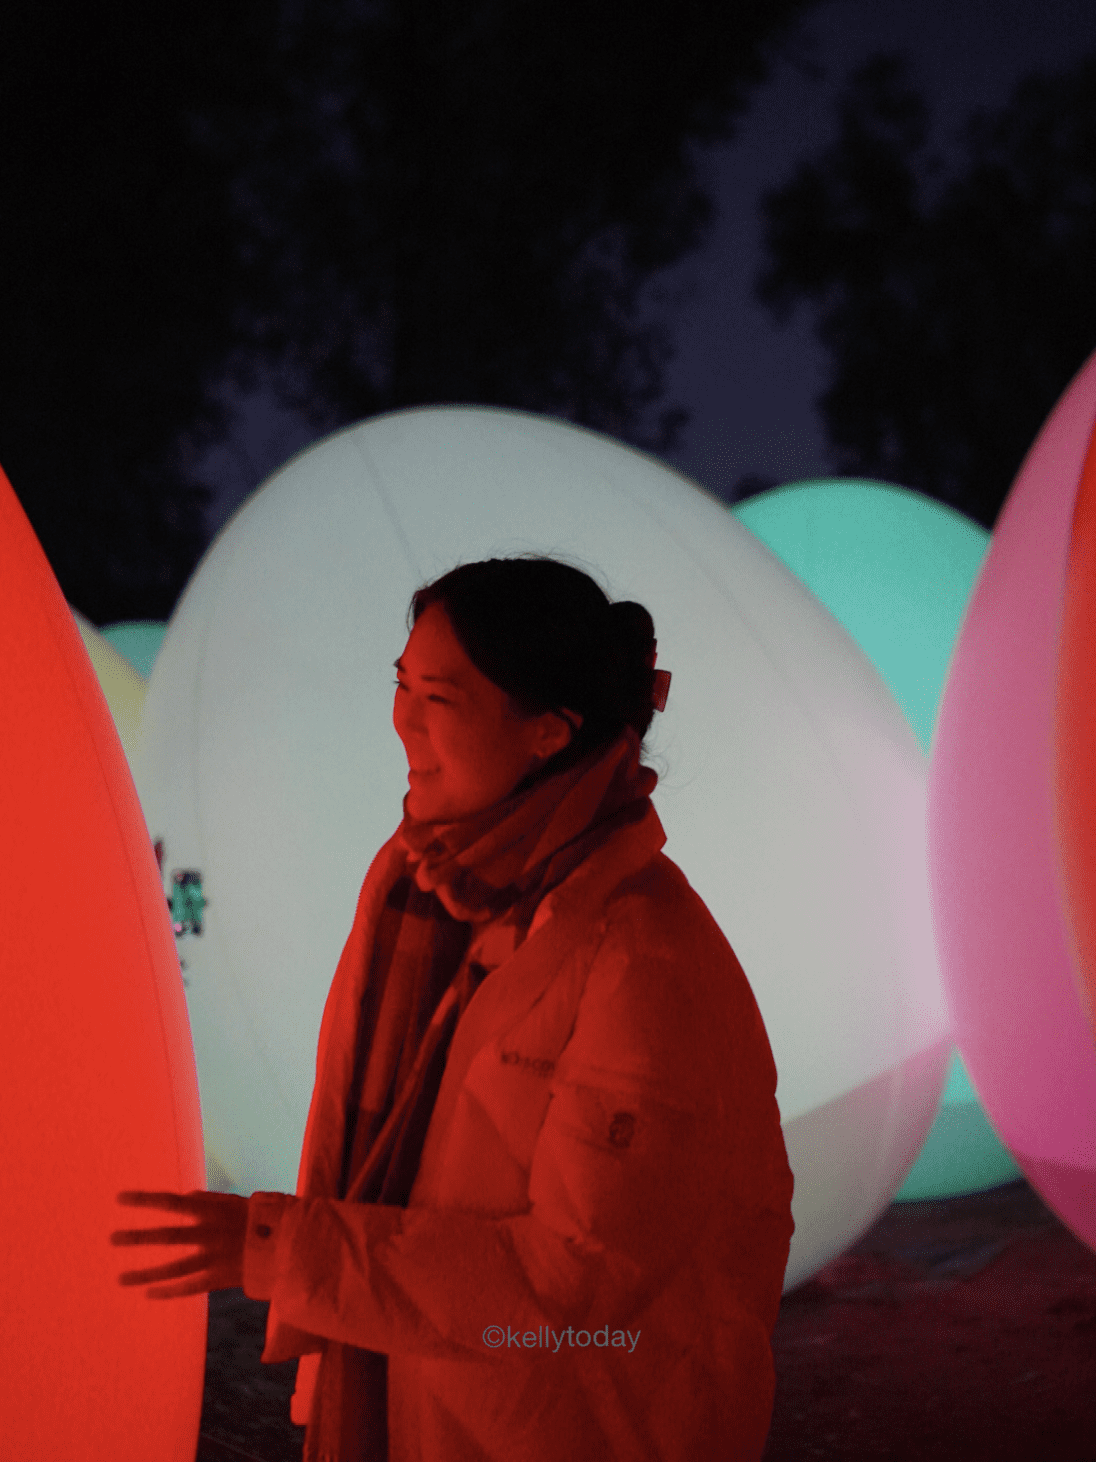

Examples: Time of Day
What resources do you use to research photos?
I usually consult several resources for my research. This includes Google Earth, Blogs, the Outbound, All Trails, Pinterest, and Instagram. These resources are helpful for finding spots to explore, and photograph and also provide inspiration for different compositions. During my research, I’ll save a series of photos for inspiration to adapt to my own personal photos.
I also try to get an idea of what the location looks like before I visit. I can do this remotely by using street view on Google Earth. Or if it’s a location nearby I might visit the place in person. This is helpful in letting me get an idea of what direction the light will be coming at different times of the day. As well as determining what the best time of day I’ll want to shoot at.
Photography: Compositions & Shooting in Manual Settings
Gear I use for photography
Before I leave on any trip, I always make sure to pack all of my camera gear. For a full comprehensive list of my camera gear check out my most recent camera gear post. The main essentials I never leave behind include my camera body, my lenses, tripod, remote, and my backpack.
If you’re not confident with your camera or want someone to take your photos on your travels consider booking a local photographer. I recommend using flytographer to find a local photographer at your destination of interest. Not only will they take amazing photos on your trip but you’ll get shown the local hidden spots that most tourists won’t know about.
How to set up the photo shot (steps)
- Consider your photo compositions. Look for interesting textures, leading lines, beautiful reflections, or anything that catches my eye. Usually, this is how I decide to take the photo and how to frame it.
- Set up your photo. Get your tripod and remote. Take a few test shots on your camera. Check if your autofocus is on and the correct focus area is selected for the shot. Also, check if no one is in the frame. This might be hard in crowded areas, so try your best otherwise you can edit people out in the editing stage. After, I turn on the remote and adjust my manual settings (ISO, Shutter Speed, and Aperture) according to the scene. For more on shooting in manual settings, check out my Travel Photography E-Book.
- Test shots with a subject in the frame. After the manual camera settings are set. Place an object (e.g. backpack) in the frame so your camera can focus on something in the place where you are standing. If you have a friend or family member you can get this person to move in the frame to check if the settings and composition are to your liking. After I move into the position with my remote to check that I’m within range of the camera.
- Pose & shoot. After I’ve done a couple of test shots and I’m happy with my framing and composition, I start taking 10 to 15 shots with various poses. After a few minutes of shooting, check the photos before moving on to the next location.
This process might sound like a lot. However, I love having these photos to look back on. I personally think it’s worth it in the end.
Want to find out how to take photos by yourself as a solo traveller or at home? Read this step-by-step photography guide.
Post-Processing: Editing Your Images
After I’ve finished taking photos, I transfer my RAW files into multiple places. I usually back them up on hard drives and the Lightroom Cloud. Don’t learn the hard way of losing all your content and back up your content. To convert your files to my hard drives or laptops, I use a CD/SD Card Converter.
For editing, I use Adobe Cloud for everything, including Lightroom Classic, Lightroom, and Photoshop. I usually go through my photos first tagging the ones I want to import and edit in Lightroom. If you’re interested in more in-depth information on editing photos check out my photography guide.
Example: Photo Edit
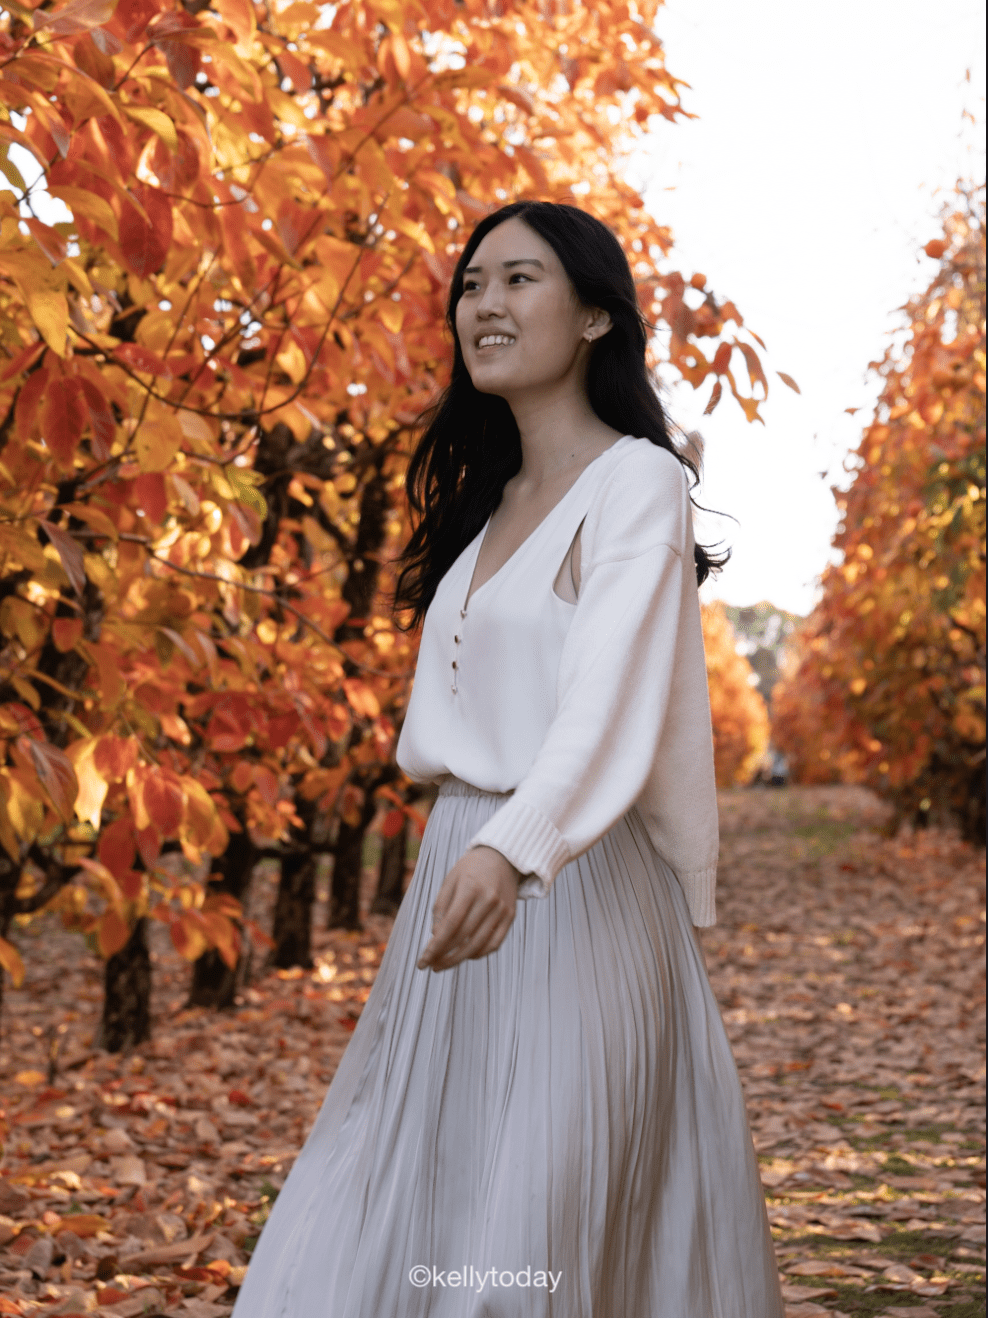
1. Raw Photo
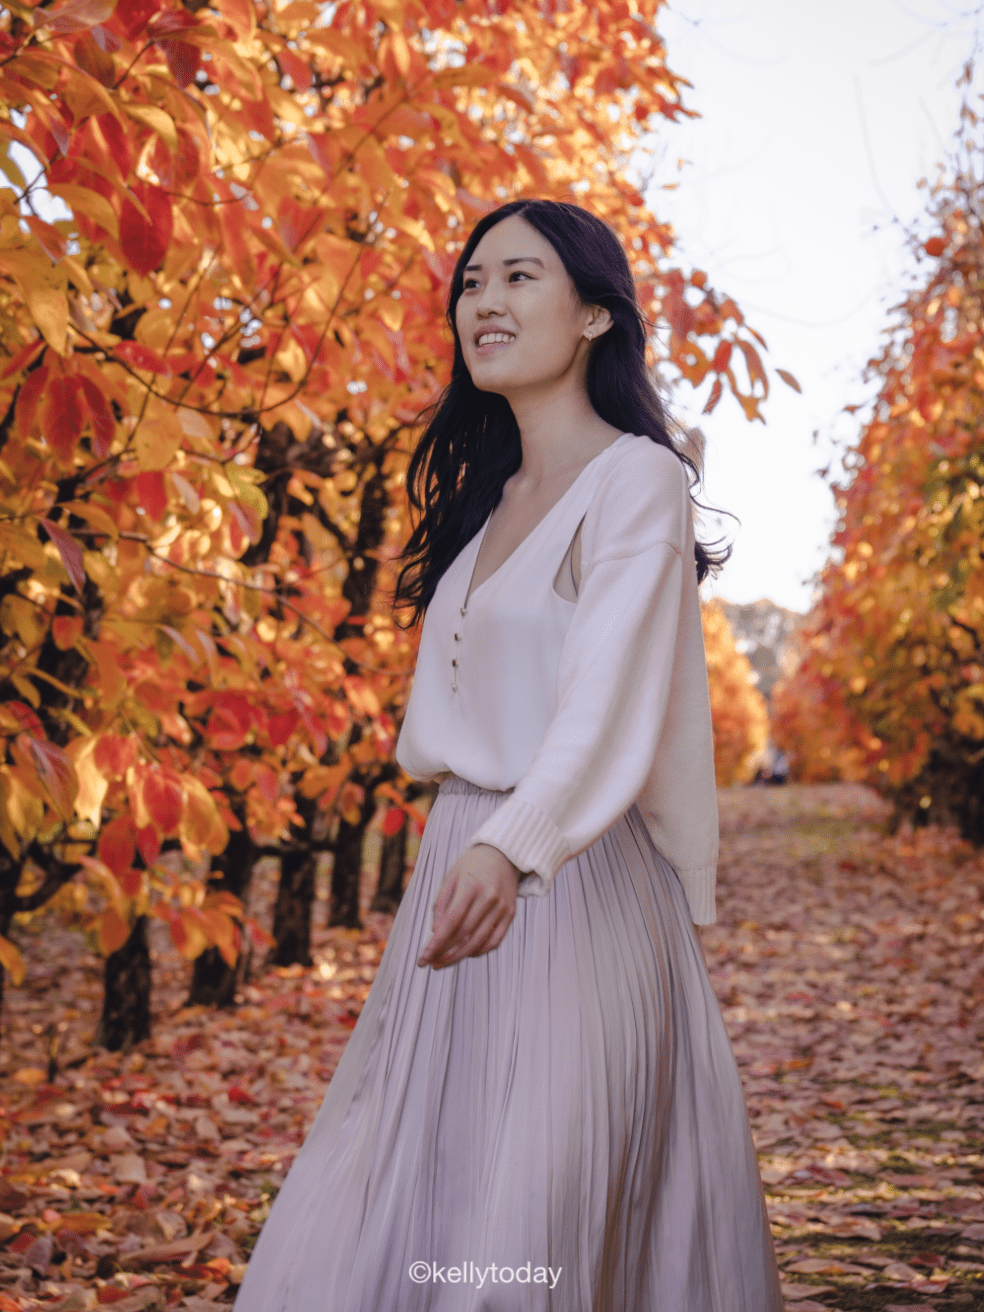
2. Basic Edits (Light & Colour)
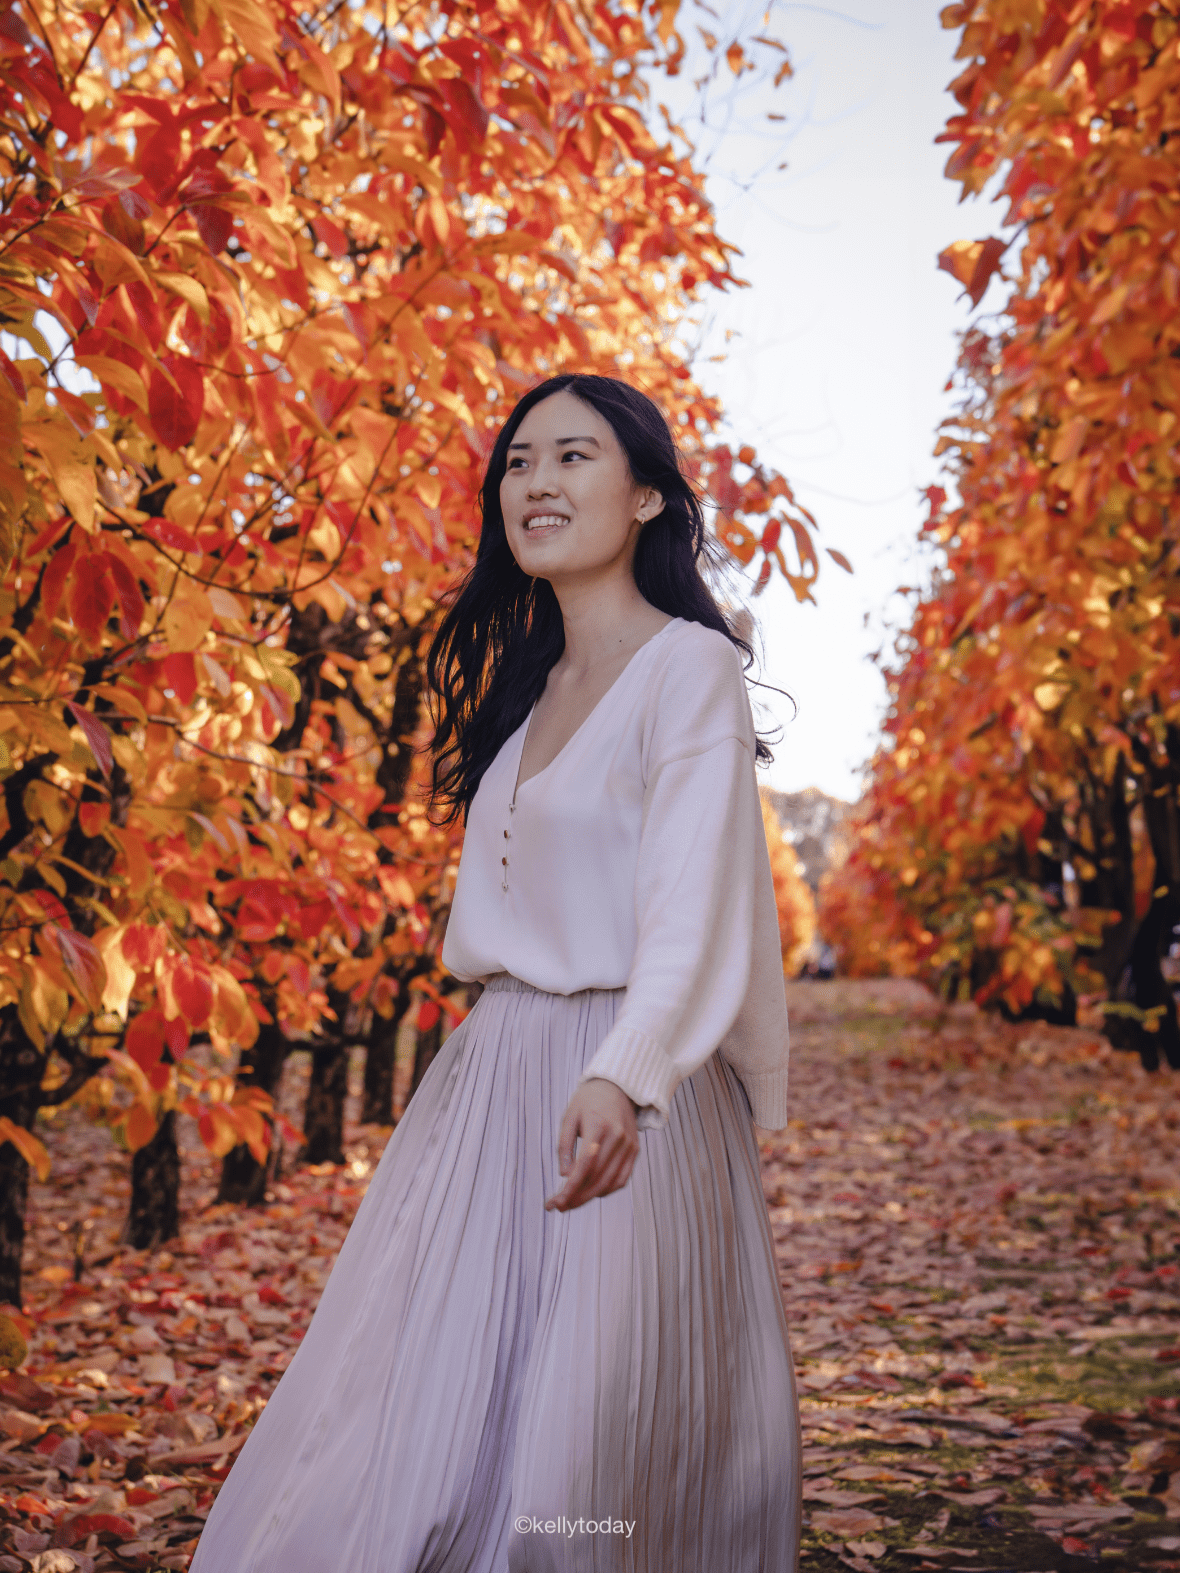
3. Final Touch Ups
Exporting & Posting Your Photos
I export my images from Photoshop or Lightroom based on the output format. I often use the custom export feature to set the long side of the photo’s pixels to match 1350 pixels. I found this was the best for maintaining image quality for Instagram. This keeps the image clear and large enough that Instagram doesn’t compress it and decreases the quality upon posting.
What settings do you use to post on Instagram?
- Image Crop: 4:5 aspect ratio
- File Format: JPEG or PNG (JPEG is the default in Adobe Lightroom)
- Color Space: sRGB
- Quality: 100
- Size: 1080px x 1350px
- Sharpen for Screen
These settings may differ from what other creators recommend. I’ve found these settings work well for displaying my photos on social media.
Overall this is my entire creative process. From researching, taking the photos, editing, and sharing them online. You’ll see there are a lot of steps involved in my creative workflow.
Found this helpful? 👇🏼
Support my work by buying me a coffee so I can produce more free content for you.
📌 Click on the pin to save this for later.
Follow my daily adventures on @kelly.today




Leave a Reply
You must be logged in to post a comment.