• Home
  • Blog
    • Travel Tips & Guides
    • Working Abroad
    • Photography
    • Books
  • Travel
    • Europe
    • South Korea
    • Japan
    • Australia
      • Western Australia
  • Free Resources
  • Shop
  • Portfolio
  • About
    • About Me
    • Frequently Asked Questions
  • Work with Me

Explore

  • Work With Me
  • About Me
  • Shop
  • Blog

Connect

Kelly Today

Blog, Photography, Travel Tips & Guides · November 21, 2023

How To Take Photos Of Yourself as a Solo Traveller

The number one question I get asked on my Instagram is “how do you take photos of yourself as a solo traveller?” The answer is about 90% of the photos you see on my Instagram or blog are taken by me. Since starting my social platforms a lot require ‘epic’ photos and I’ve picked up a few helpful tips and tricks as a self-taught photographer and solo traveller I wish I knew before starting my photography journey.

In this post, I’ll be sharing how to take pictures of yourself for Instagram or on your travels. This includes a step-by-step guide on how to take photos of yourself when travelling solo or alone at home.

Contents hide
1 Look for Inspiration
2 Invest in a Camera
3 Steady Tripod
4 GorillaPod
5 Interval Timer
6 Self Timer – Remote Control
7 Bluetooth or WiFi Connection
8 Versatile Lenses
9 Drone
10 Get Creative with a GoPro Camera
11 Ask a Stranger
11.1 How to get strangers to take photos of you
12 Hire a Local Photographer
13 Take a Tour
14 Reach Out to Solo Travellers
15 Get Creative
16 Go Early
17 How To Now Look Awkward in Photos
17.1 Use a Prop
17.2 Sitting Down
17.3 Incorporate Movement
17.4 Get Creative With Your Hands
18 Watch Out For Your Camera
19 Back It Up
20 Practice Makes Perfect
21 Frequently Asked Questions
21.1 How do you edit your photos?
21.2 Is there an app to take pictures of yourself alone?
21.3 What is the best tripod for solo travel photography?

Disclaimer: This post may contain affiliate links, which means I get a small commission if you make a purchase (at no extra cost to you). It’s one of the ways I can keep producing free resources and guides for my readers. Thank you for your support! Refer to the Disclosure Policy for more details.

Look for Inspiration

Before embarking on your destination it’s always helpful to research and plan what kind of pictures you want to take before your trip. I usually refer to multiple resources for looking up photo inspiration including Pinterest, Instagram, TikTok, and other blogs. For example, if I’m travelling to a certain location I’ll look up ‘Instagrammable places in (place)’ such as Instagrammable places in Melbourne‘ or photo spots in (destination). This is also a great way to see what previous travellers have taken in a certain spot where you can take inspiration from and plan what photos you want to take.

Don’t miss out on my full step-by-step guide to creating travel content in this post.
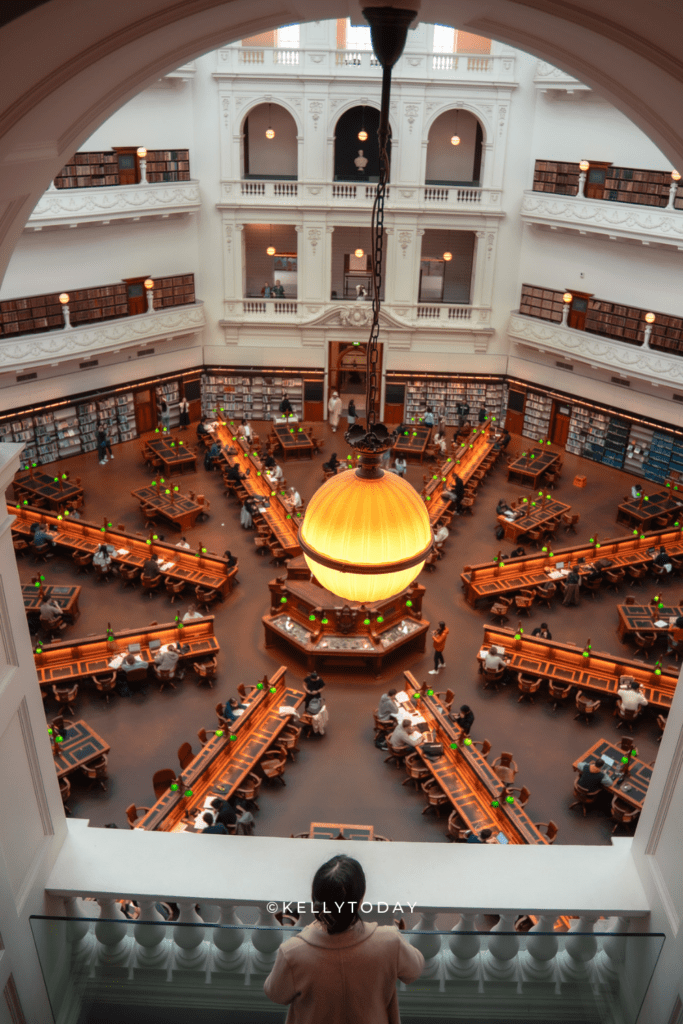
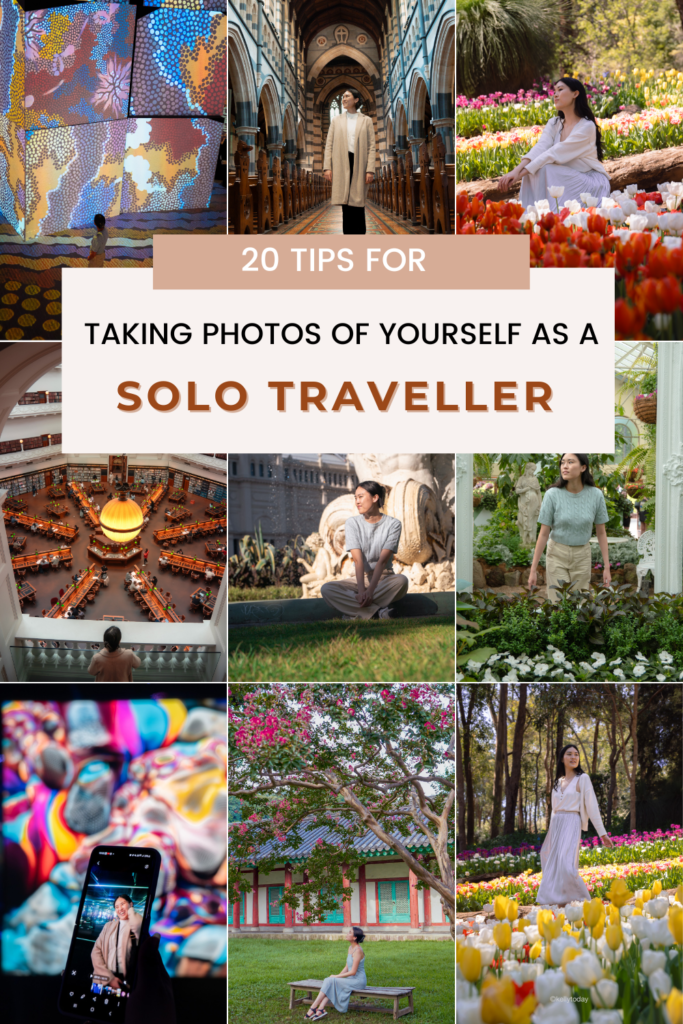
How To Take Photos Of Yourself as a Solo Traveller

Invest in a Camera

There is no need to spend a huge fortune on photography gear however you should be prepared before you go. If you’re not satisfied with your current camera or want to get into photography, always do the proper research to upgrade ahead of time.

I’ve been a loyal user of the Sony camera, using the Sony 6400 as a beginner photographer. It’s Sony’s top-of-the-line entry-level camera with stunning photo quality and versatility for all your solo travel photography needs. Its body only weighs 359g, which is handy since you have to carry all your own items while travelling solo. The camera also features a WiFi and Bluetooth connection which allows you to connect your camera to your phone and remote controls. Lastly, the camera has an interval timer feature which is helpful when taking all your own solo travel photos.

Here are some additional helpful tips for photography gear on your travels. If you are investing in photography gear always make sure to get travel insurance. Don’t make the mistake of learning the hard way whether it’s losing your belongings or a cancelled flight. Anything really can happen so it’s important to have travel insurance to cover the cost of your valuables. Also, make sure you pack all your valuables in your carry-on to avoid damage or theft.

View this post on Instagram

A post shared by kelly ☁️ travel & lifestyle (@kelly.today)

Steady Tripod

A steady tripod is your best friend to take your own photos as a solo traveller. Originally I used to work with the affordable and compact TYCKA tripod, which only weighs 1.3kg and has a maximum height of 142cm (56 inches). It’s a great tripod if you’re shooting with a compact camera. However, if you need something more steadier and lighter you’ll love the Manfrotto Befree Advanced Tripod. It also features quick-release plates, which means you don’t have to screw and change the camera every time you want to mount it. This means you can work faster to get those photos!

If you don’t have a camera you can also use a tripod with your phone and set up a self-timer. It’s also easier if you have a phone tripod with a Bluetooth remote. If you’re not ready to invest in a tripod you can also just prop your phone against any study item including a water bottle, or your bag, or even use your surroundings like a wall. Don’t be afraid to get creative. You might get a few weird looks but when are you ever gonna see them again?
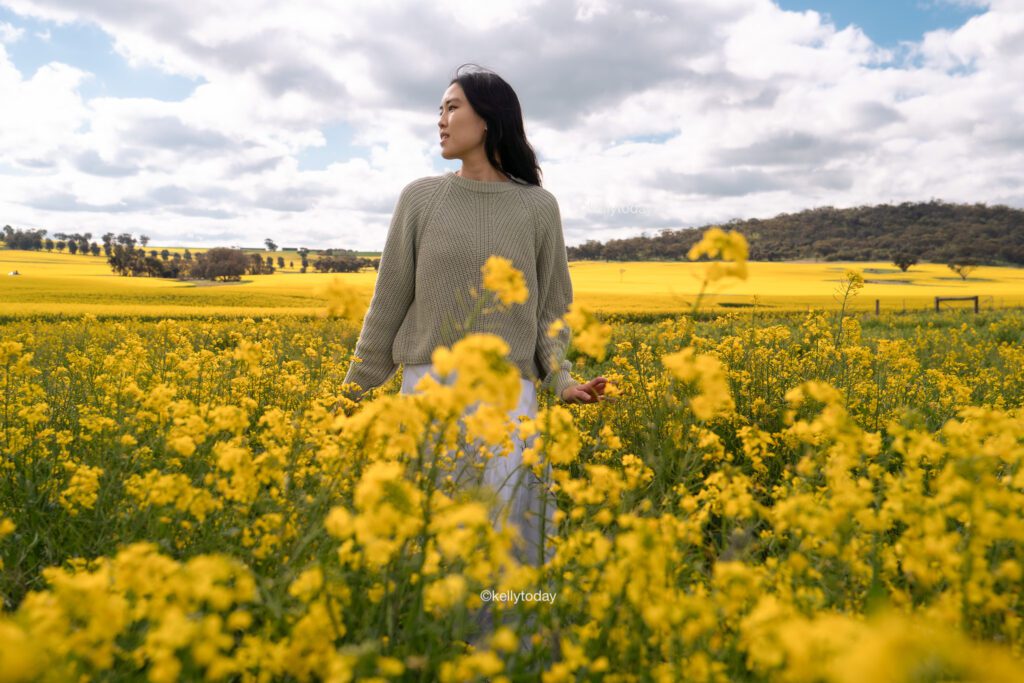
I took this photo with the Manfrotto tripod.

GorillaPod

If carrying a tripod is too daunting in terms of space and weight then opt for a smaller and lighter photography accessory. GorillaPods are compact and lightweight and are less obvious when you’re taking photos of yourself in public. One of the great advantages of GorillaPods is they are also very flexible by manipulating the legs to any position or fastening them around tree branches, railings, really anything! I personally use the Joby GorillaPod for my solo travels. An important tip, if you’re looking to invest in a GorillaPod, it is important to check if it will be compatible with your camera in terms of supporting the weight. Joby for example has GorillaPod tripods for a range of camera gears including a mini tripod or tripods which support camera gear weighing 3kg to 5kg.
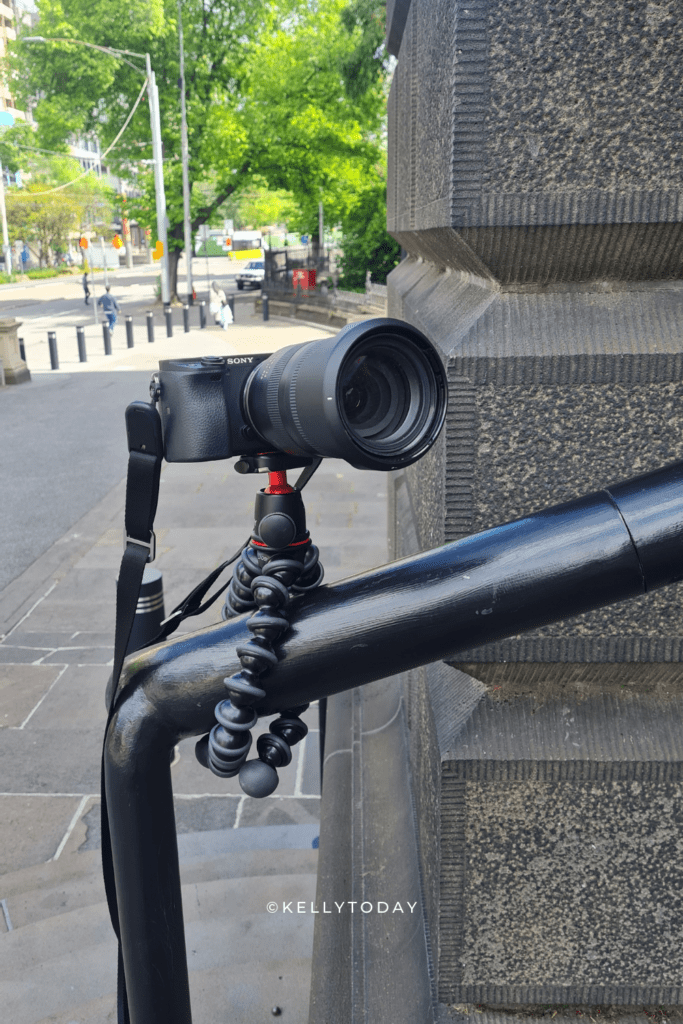
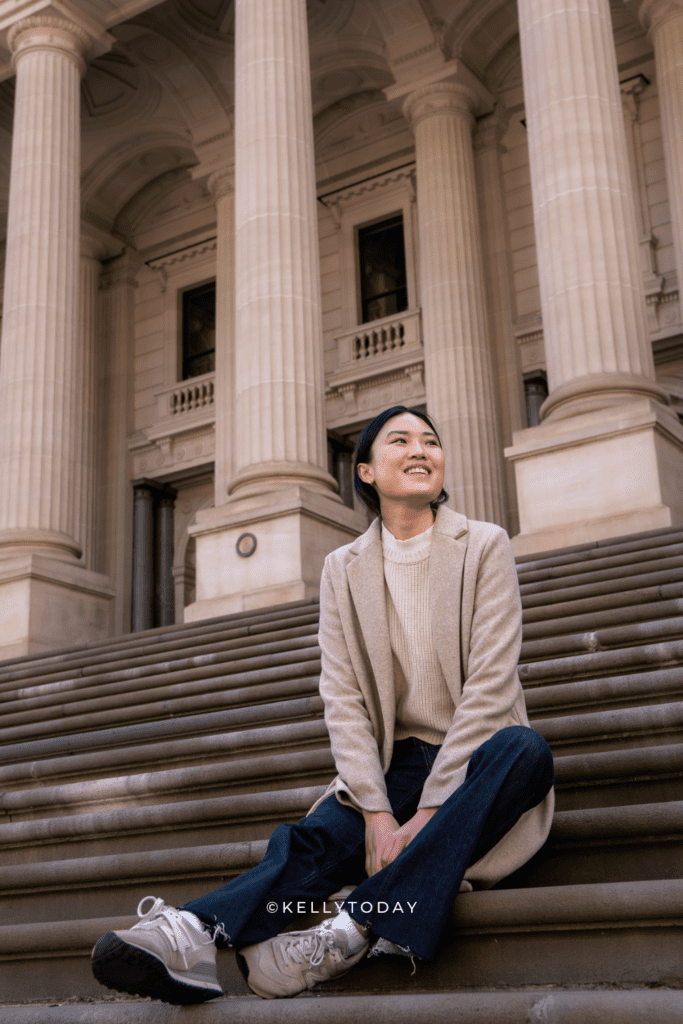
The Joby Tripod was used here.

Interval Timer

One of the best ways of getting photos of yourself is setting up your tripod, mounting your camera or phone in the position you want it, and setting it on a timer to take photos. Most cameras will have self-timer modes including Sony which has ‘Interval Shooting’ mode. Once this feature is turned on, you push the shutter button and your camera starts to take photos within the selected interval time.

A helpful tip is to study your camera manual thoroughly or to experiment with the timer modes available before your travels. The worst thing is to show up at a photo location all set to go and then struggle with your camera settings.

To best set up your camera to take photos of yourself you’ll want to set it up in continuous mode. This feature will set up your camera to take photos for you, which means you don’t have to keep running back and forth to start the timer each time. I usually set my camera to take 50 photos with an interval of 1 or 2 seconds. This way, I can experiment with different movements and poses with enough time between every shot.
Self Timer – Remote Control

An alternative way of taking your own photos is by using a remote control shutter that works with your camera. As a Sony camera user, I use this remote control which allows me to control my camera’s shutter with different options including instantly, a two-second delay and hitting the record button. I usually put it on a self-timer for 10 seconds and activate the interval timer. This allows me to get into position first, then press the button on the remote control and wait till the camera starts taking photos. If you’re looking to invest in a remote control for your camera always make sure it is compatible with your camera model. For example, if you have a Canon you need to get a Canon Remote shutter and for Sony and Sony remote control.

Bluetooth or WiFi Connection

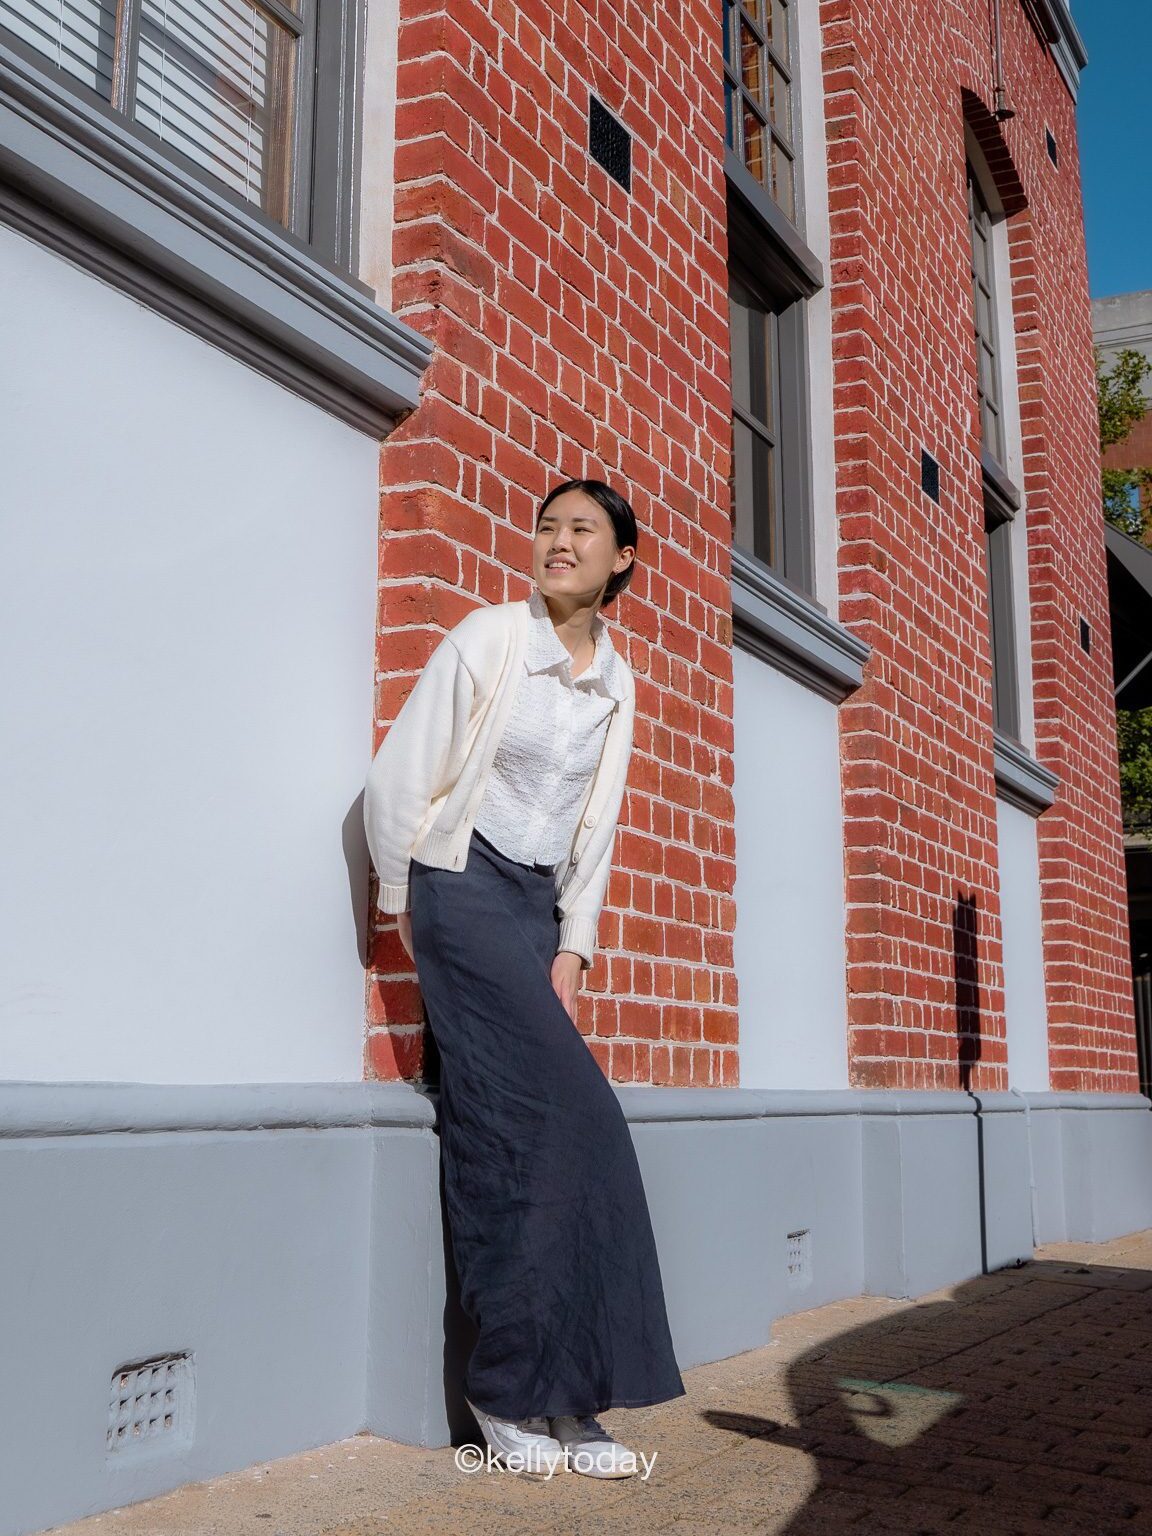
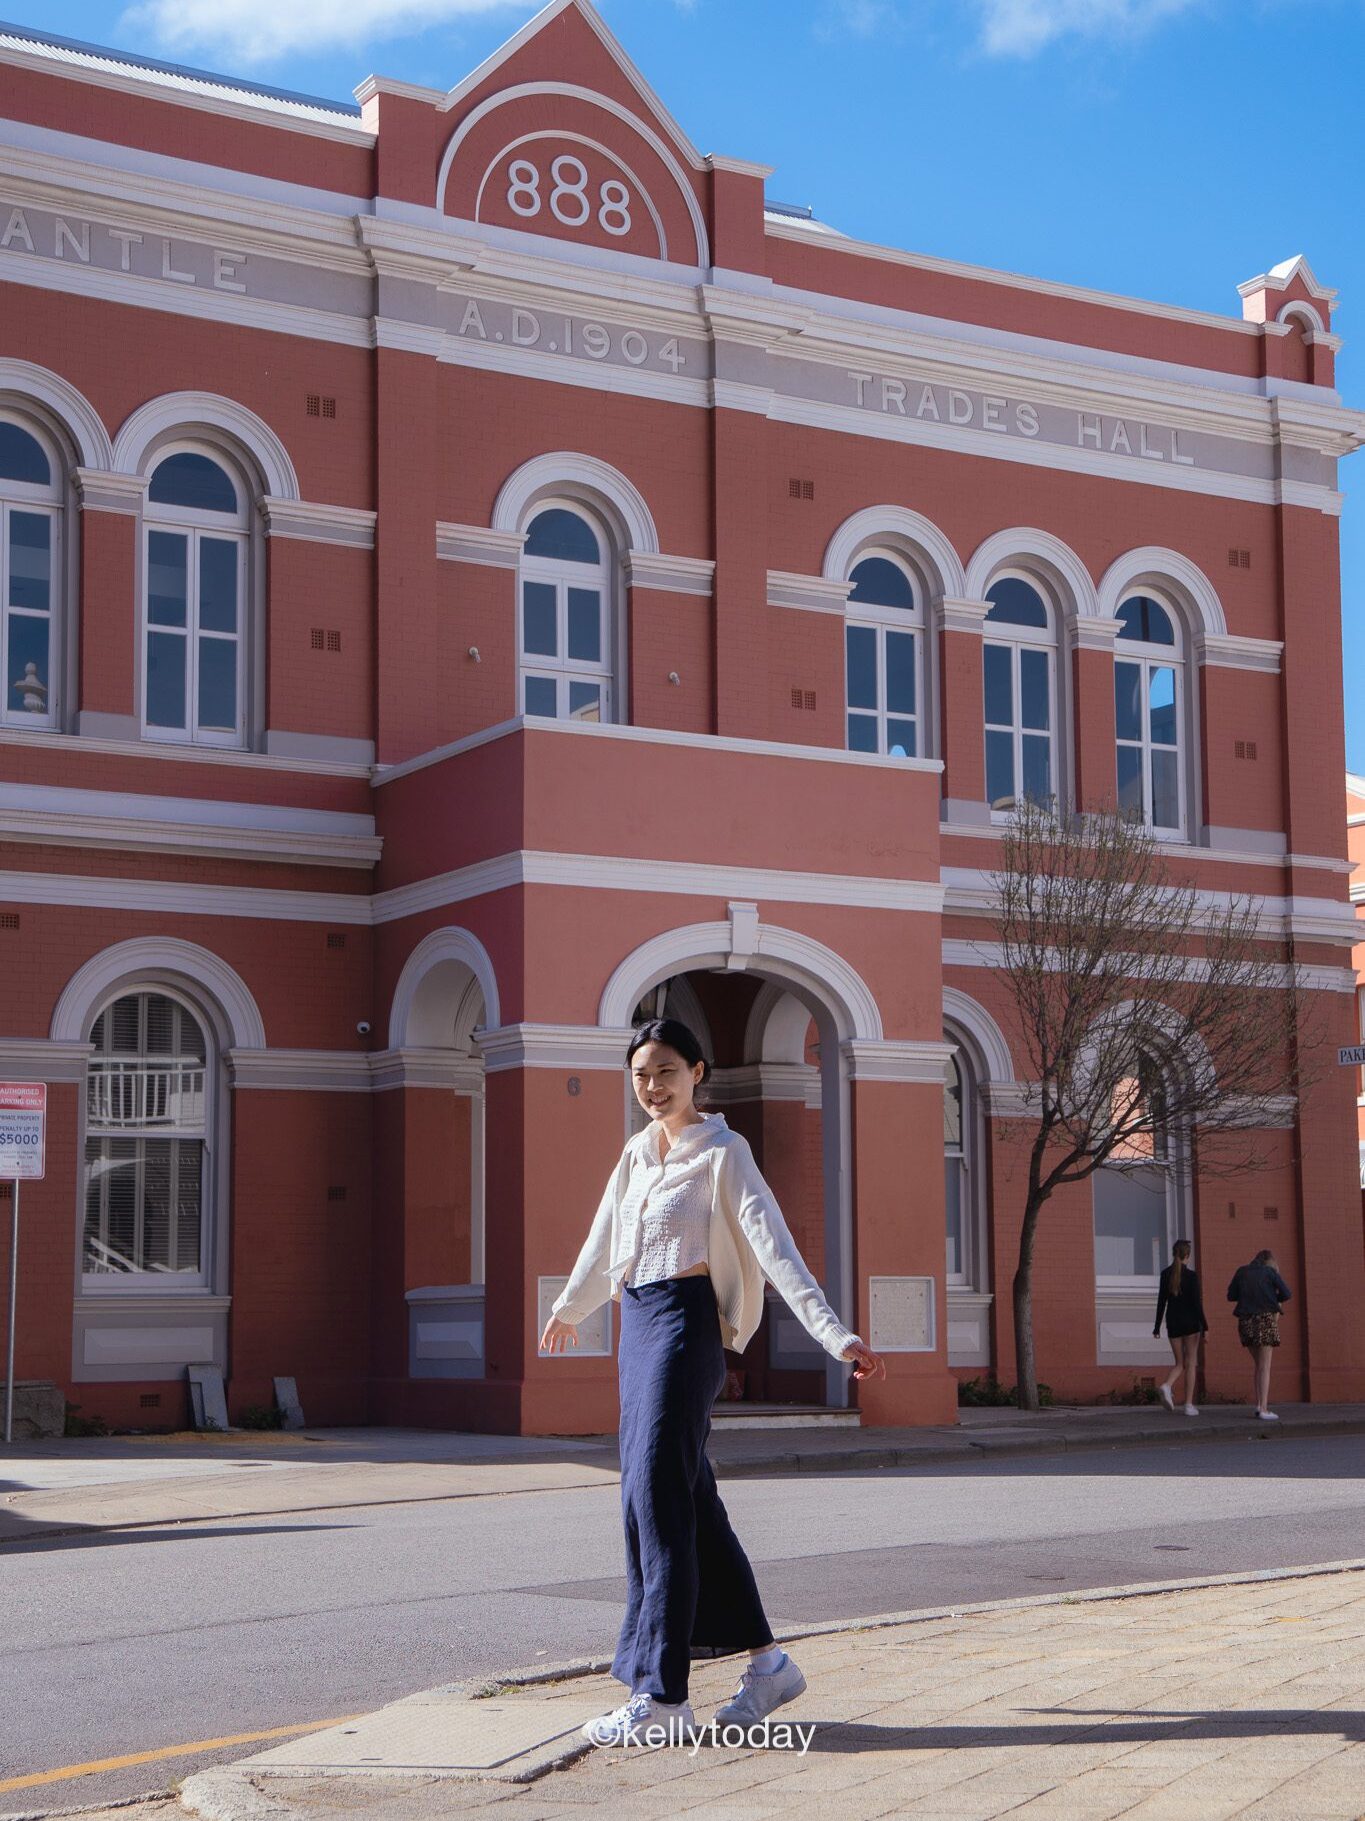
Most of the latest cameras also feature Bluetooth or WiFi connections. Sony has its own app called Imaging Edge Mobile which allows you to transfer your photos from your camera to your phone as well as take photos remotely with your camera using your phone or a tablet. Simply connect the camera with the app, position yourself in the camera frame, activate the self-timer continuous mode, focus the camera on you and press the button on your phone. Usually, you will have about 10 seconds to hide your phone and then your camera will take your photos.

The advantage of using this method is that you’re able to see where you are in the shot. However, this challenge can be overcome by simply focusing the camera on the spot where you’ll be standing.
Versatile Lenses

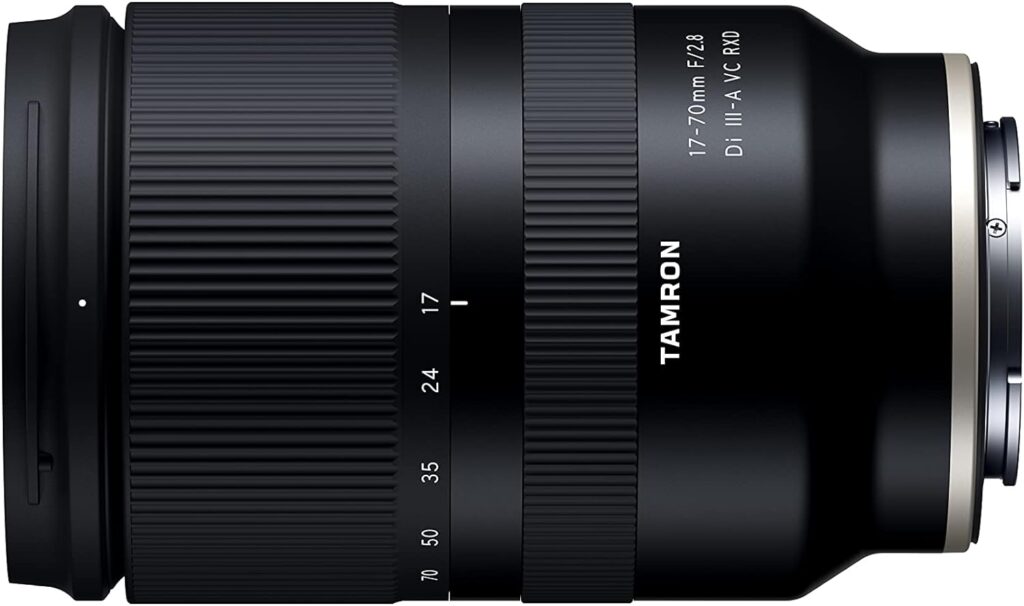
If you’re traveling solo you don’t want your bags to be heavy. Whether you’re exploring around the city or hiking with a backpack it takes a toll on your back and shoulders. As a solo traveller, I only use two lenses; Sony FE 35mm and Tamron 17-70mm. These camera lenses are quite affordable and versatile in a range of photography situations. With the zoom lens, you have a reach of 70mm and you can also take wide-angle photos of yourself in landscapes or buildings.

If you’re just starting photography and don’t have the budget for a camera and/or camera lens, don’t worry! Take advantage of the different camera angles on your phone including the wide-angle. The great thing about a wide-angle lens (~12 to 17mm) is that it allows you to take unique point-of-view and action shows that you won’t be able to get via regular angles. Wide angles are also the best at capturing those grand architectural background shots.
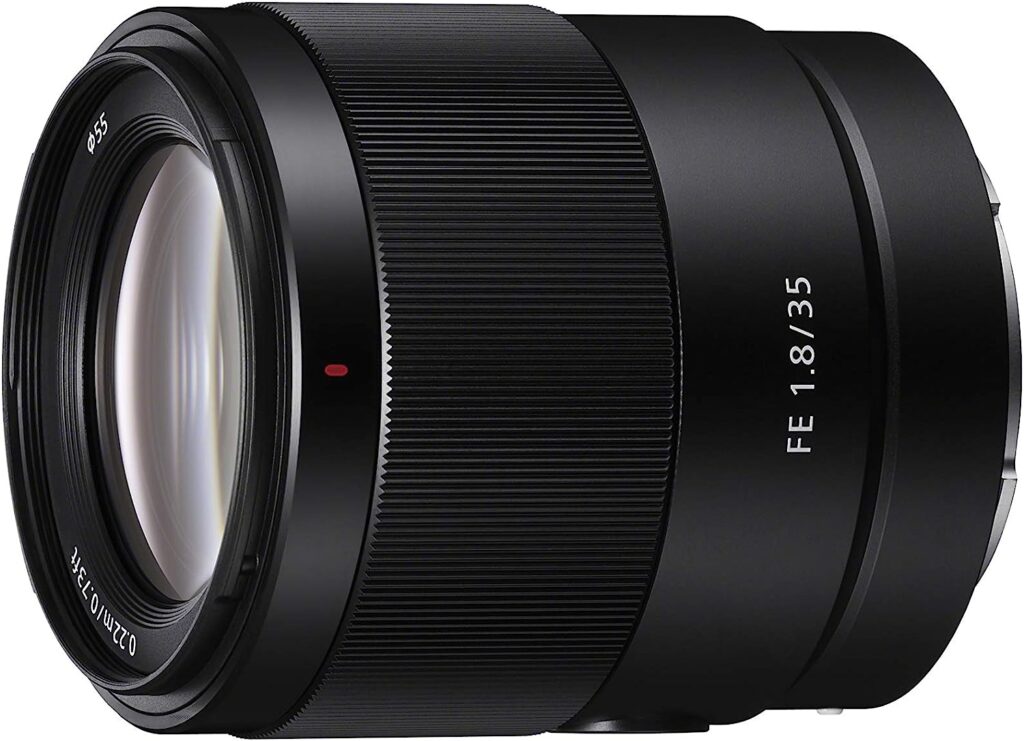
Sony 35mm Prime Lens f/1.8
Tamron 17-70mm f2.8

Drone

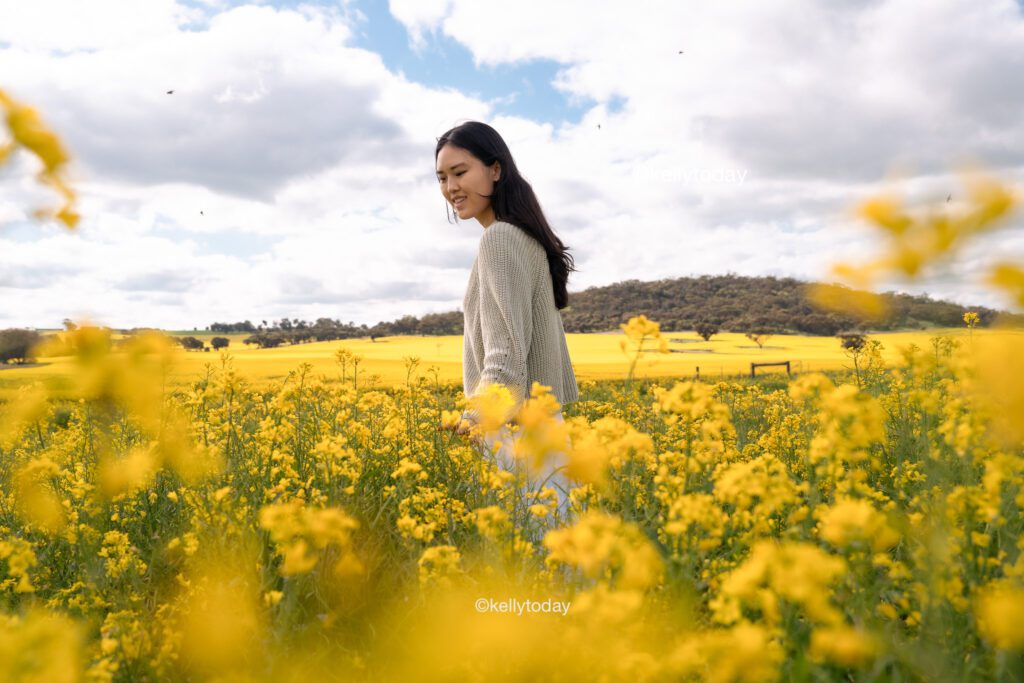
A drone is also a perfect solo travel companion to get self-portraits. I recommend the lightweight and compact DJI Mavic Mini 3 to take on your trips. It takes a bit of a learning curve to use a drone but once you get the hang of it it’s easy to take those photos. Simply connect it to your smartphone with the DJI Fly app, experiment with the framing and then take the photos. If you’re just starting out with a drone always remember to look up the local drone legislation in the area you’re flying.
Get Creative with a GoPro Camera

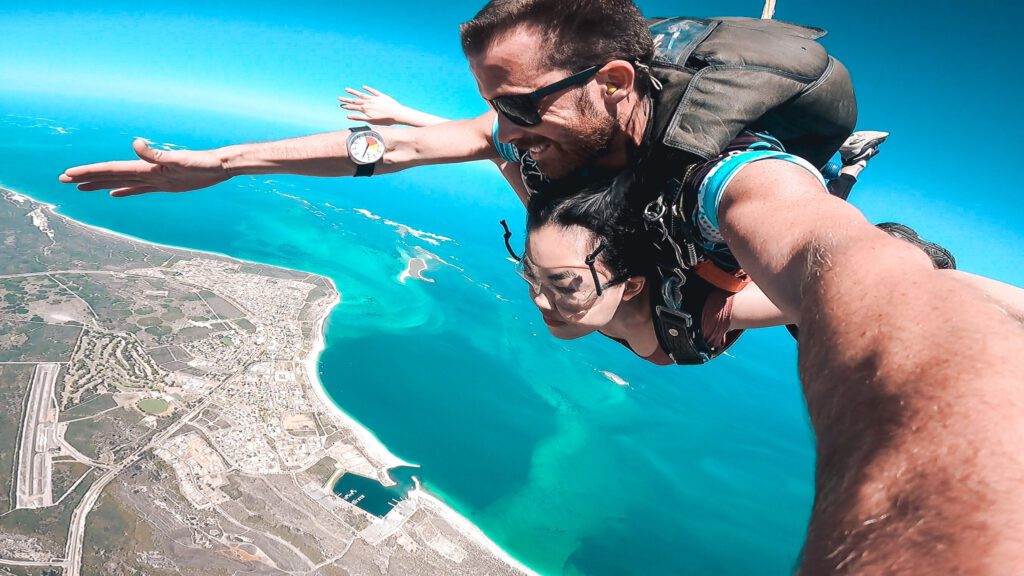
There are numerous travel situations where you aren’t able to use a camera or a smartphone on your travels including skydiving, snorkelling, ziplining, the list goes on. A GoPro camera is perfect for solo travellers getting photos of themselves and it’s also compact and lightweight.

One of the great advantages of a GoPro is that you can utilise the wide angle in a time-lapse mode and burst mode for photos or videos. Burst mode is a camera setting on GoPro that allows you to shoot hands-free, similar to a self-timer but with more control over how many photos and how often they will be taken. For example, you can set it to 1/5 which will take 1 photo every 5 seconds. This camera mode is helpful for capturing action shots of yourself like jumping and for water sports like snorkelling or swimming. If you’re looking to invest in a GoPro camera I also highly recommend getting a selfie stick to help with getting those photos of yourself.
Ask a Stranger

As a last resort if you feel a bit uncomfortable setting up your tripod or you’re visiting a spot where it’s too crowded asking a person to take your photos is another option. Whilst it might feel awkward just remember that it will only take a few seconds of a stranger’s day to get photo memories that will last a lifetime. Asking a stranger to take your photo is also a great way to start a conversation and make new friends in the process.

How to get strangers to take photos of you

Here are some tips for asking a stranger to take candid photos of you while you’re travelling solo.

  • Choose wisely – Make sure to ask a person who will know how to use a camera. If you can’t find anyone with a camera generally it’s always a great option to ask someone younger because they’ll have a better grasp of technology. Alternatively, you can ask a stranger to take your photos on your smartphone.
  • Show them the shot – Don’t be afraid to hold out the camera and position the framing for the photo you want. You can also let them know where you’ll be standing in the photo so they know what photos you’re after. Or you can take it a step further by offering to take a photo of them for reference of the photo you’d like. This is also a great way where both of you can walk away with beautiful photos.
  • Take multiple photos – Ask the person politely to take multiple shots and change positions as they take the photos.
  • Chat and be thankful! – The chances are if you make a good impression on someone they’re more likely to work harder when they do you a favour. It doesn’t hurt to get to know the person, thank them for taking the photo and of course offer to take a photo for them.

Hire a Local Photographer

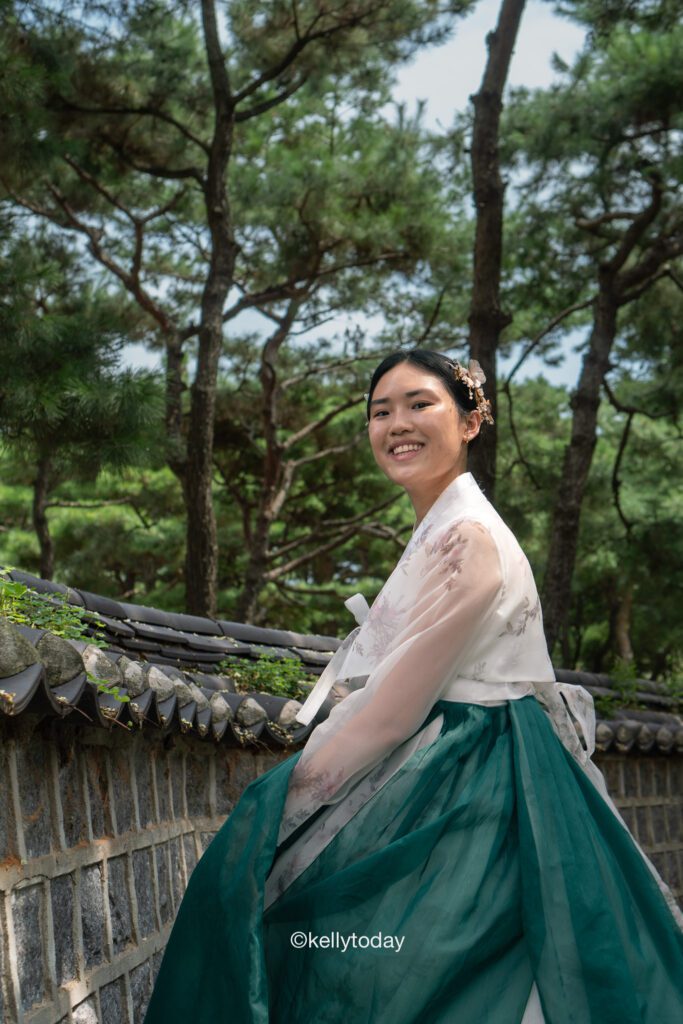
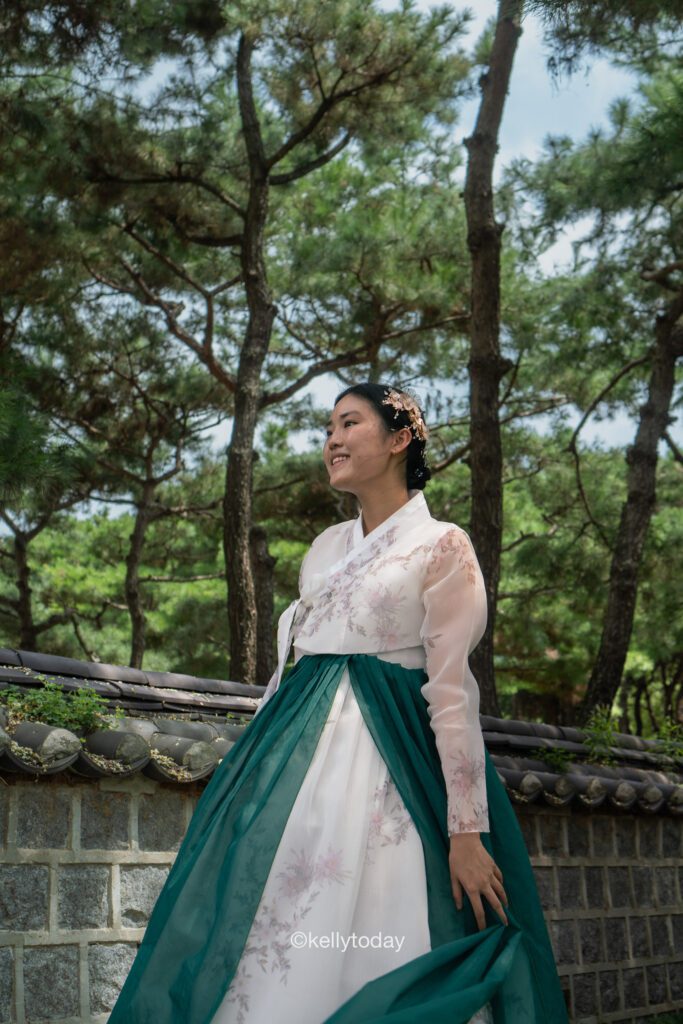
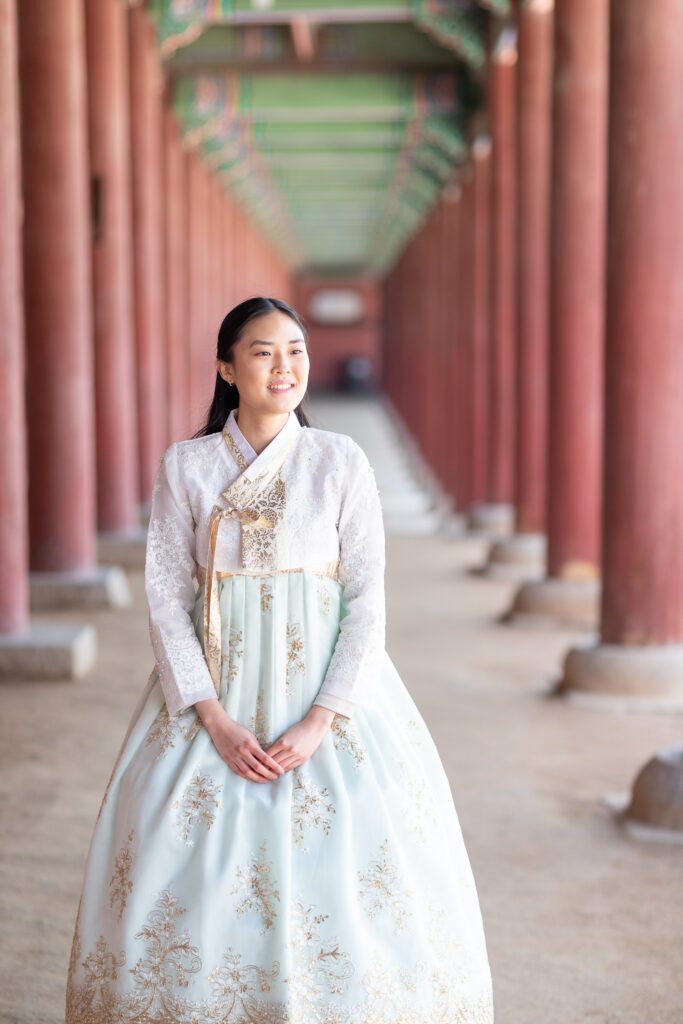
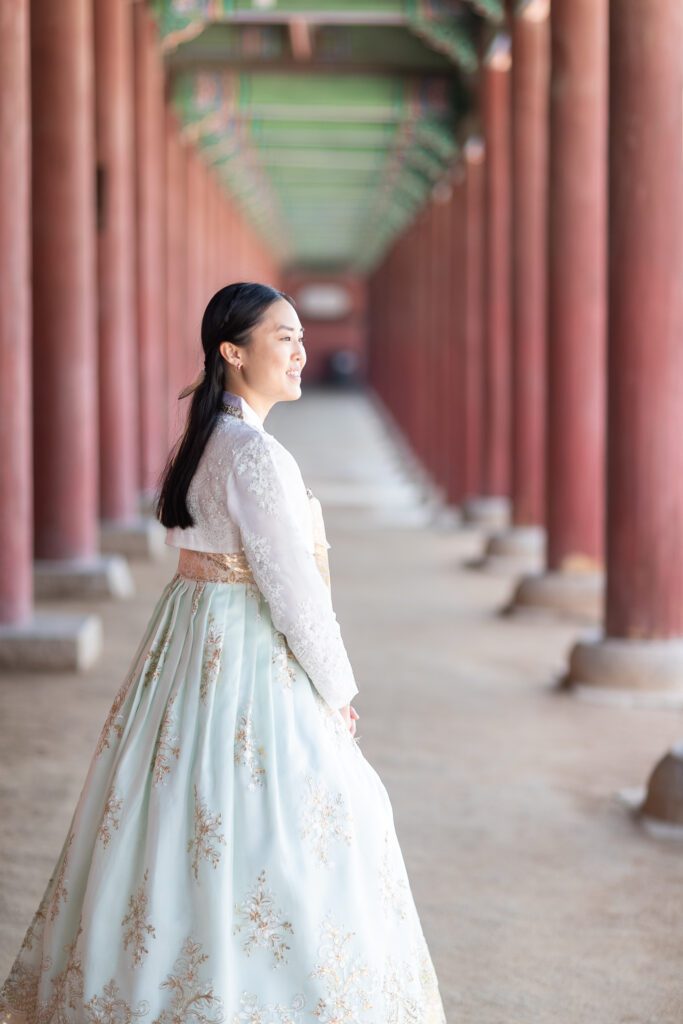
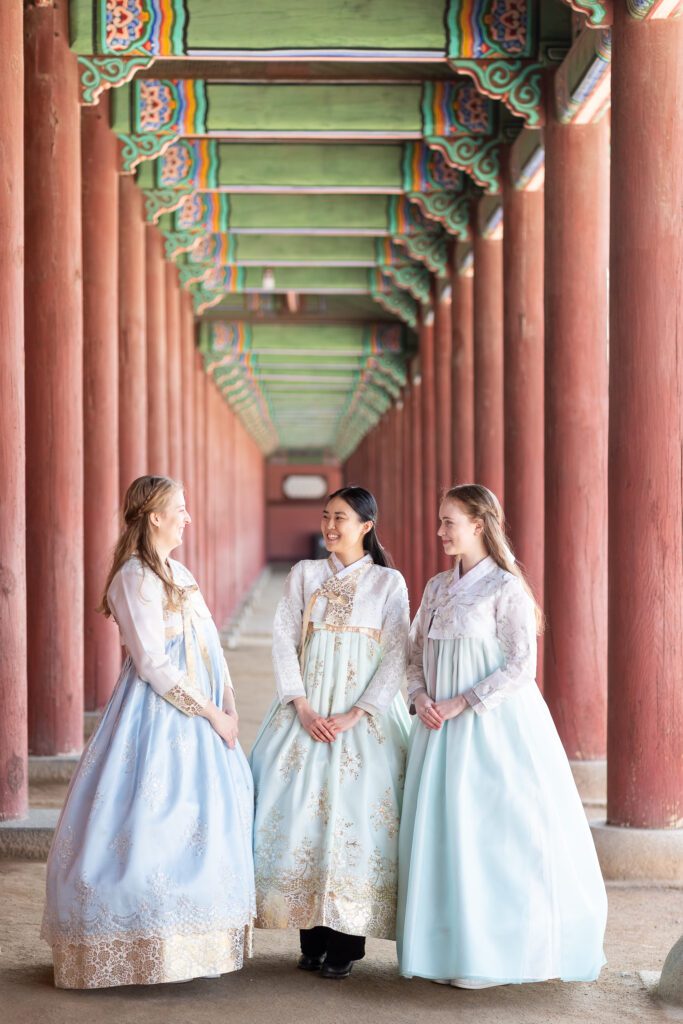
If you want the best photos from your trip consider hiring a local professional photographer at your travel destination. Not only is it the most convenient way of getting those gorgeous photos but you’ll also be getting local recommendations on the place you’re travelling to that aren’t usually known by tourists. I personally recommend Flytographer for finding local photographers around the world. I’ve personally never hired a professional photographer, however, I was lucky to have been approached by one to take photos at Gyeongbokgung Palace in Seoul for free.
Take a Tour

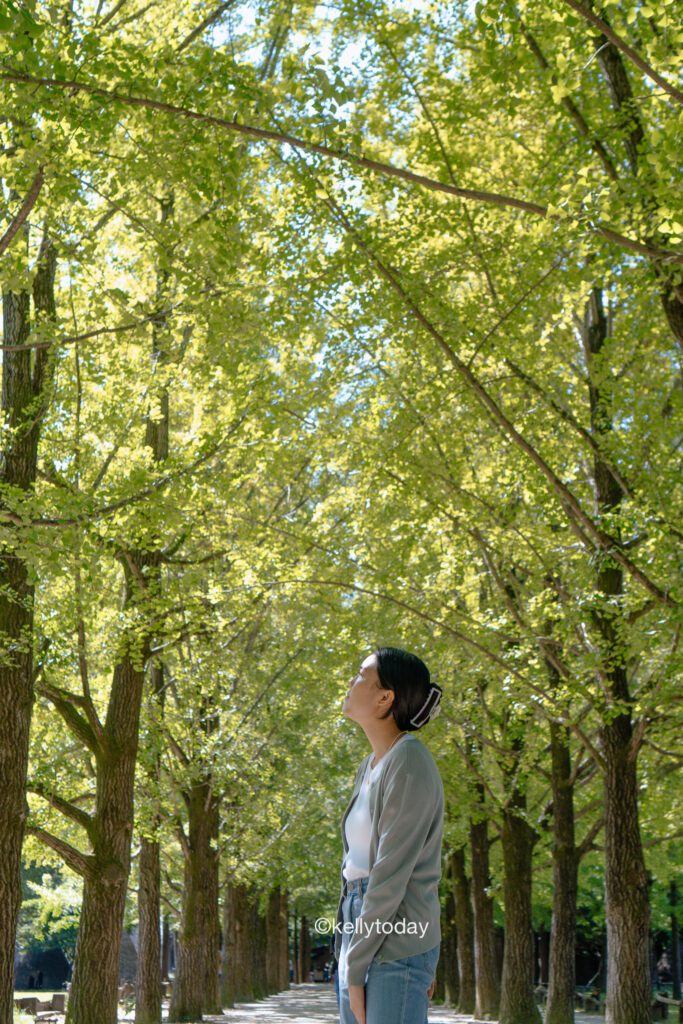
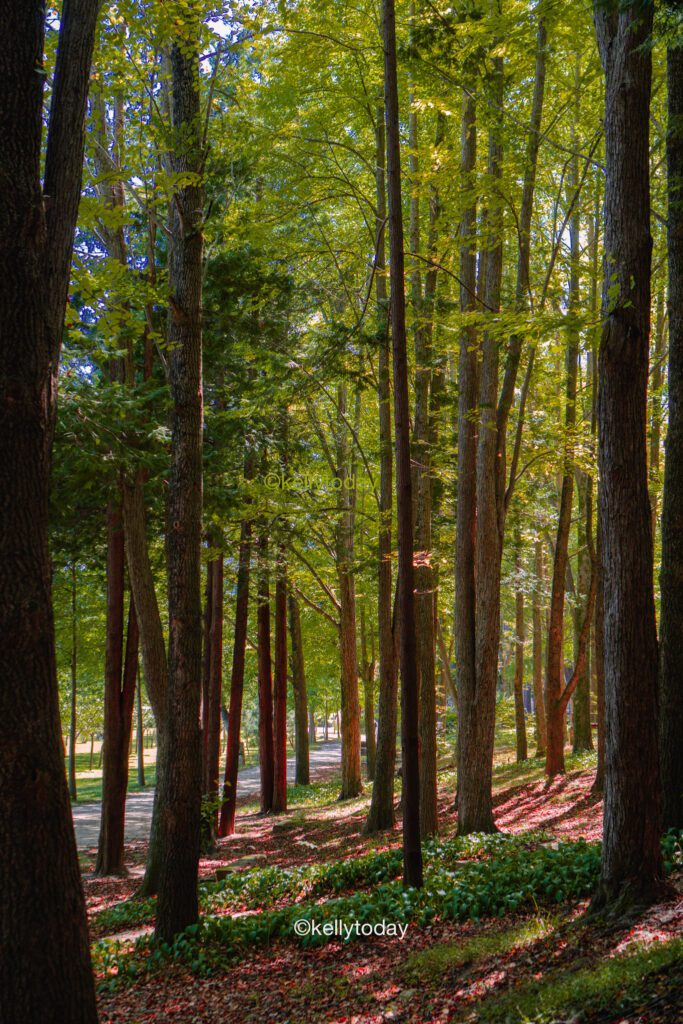
Some of my favourite travel photos have been taken by local tour guides on trips. Most of the time I find that the local guides are not only great at providing local recommendations for a travel destination but they’re also great photographers. Since they’re technically working they make more of an effort at taking your photos than asking a stranger.

Taking a local tour is also a great way to meet people as a solo traveller who may also take your photo. Generally, tours operate in different formats including group trip tours, day trip tours or free walking tours. For day trip tours I always recommend Get Your Guide and Klook for travelling overseas.
Reach Out to Solo Travellers

If you’re still a bit intimidated to take photos of yourself why not connect with other solo travellers? There is a high likelihood you’re probably in the same boat and it’s mutually beneficial for each person to get photos on a trip. If you can’t find any solo travellers to meet up in person at your travel destination don’t be scared to reach out on social media.

One of the popular ways to meet up with solo travellers is through Facebook groups. There are different Facebook groups including those exclusively for solo female travellers and certain countries. What’s common with these Facebook groups are people posting in these groups about a location they’re travelling to and in search of travel buddies. You can post in the group that you’re travelling to a certain place and looking for help to get some travel photography done and hopefully, you can connect with someone on the same boat.

Get Creative

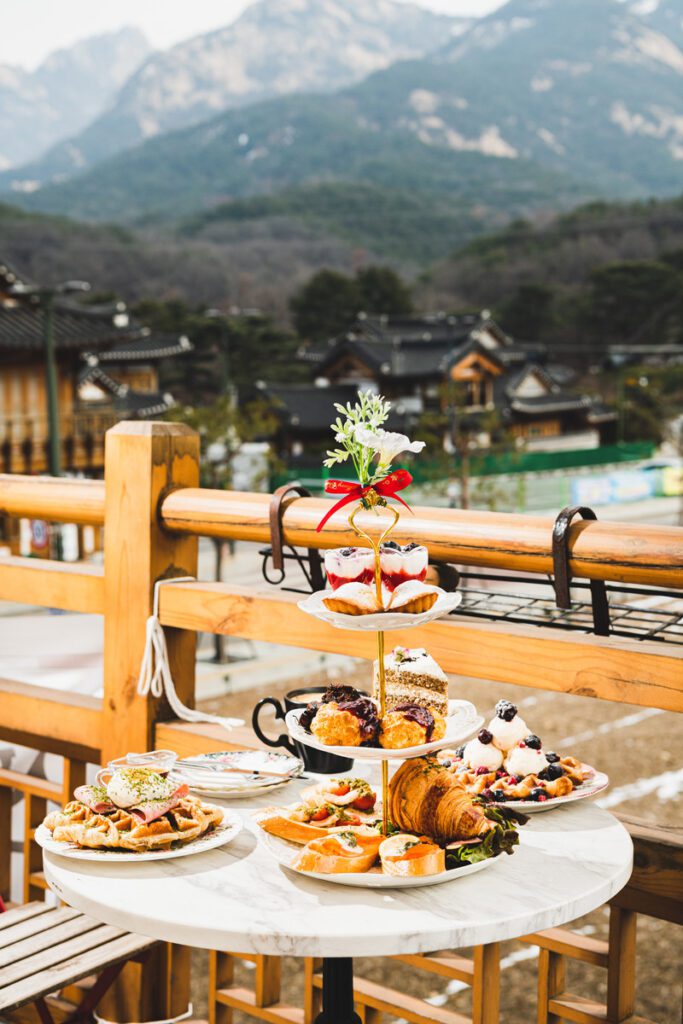
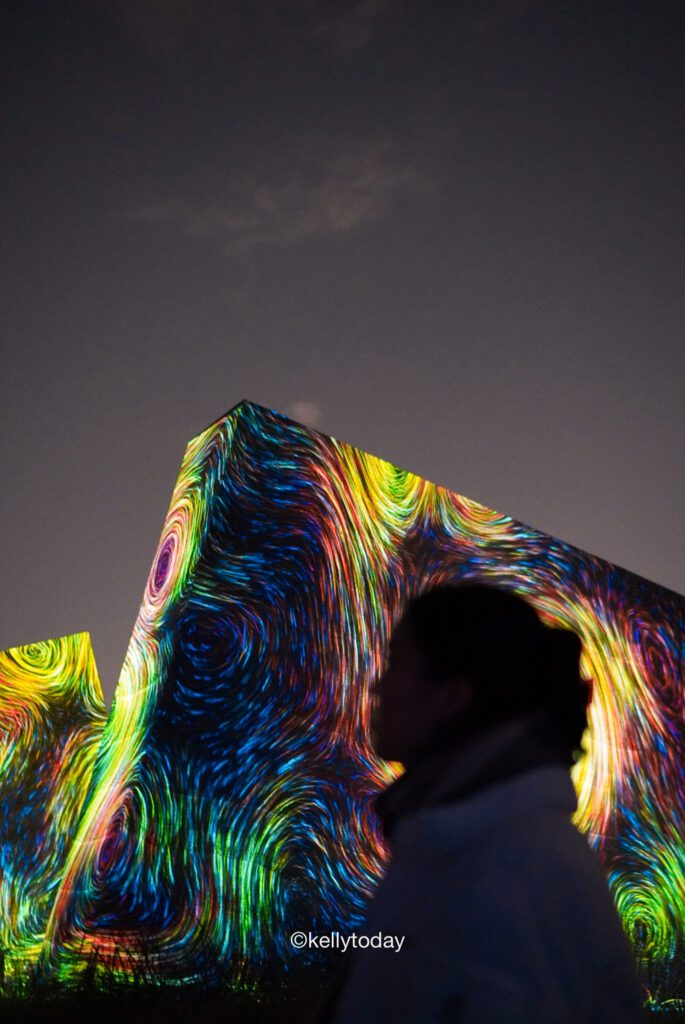
Getting photos of yourself whilst you’re travelling doesn’t always have to be that full-body shot. Don’t be afraid to get creative and incorporate different human elements in your photos from your hands, feet, and back head shots with different backgrounds. Another popular photo idea done by content creators is taking photos of themselves holding an item such as a drink or food. As an example, you could take a photo of a beverage or food with a gorgeous background. Alternatively, you can also post a photo of a person’s silhouette with a stunning background. This is a great option for those a bit shy about showing their faces in photos.
Go Early

If you’re feeling a bit self-conscious about taking photos of yourself in public here are some helpful tips on avoiding crowds when you’re trying to get those travel photos.

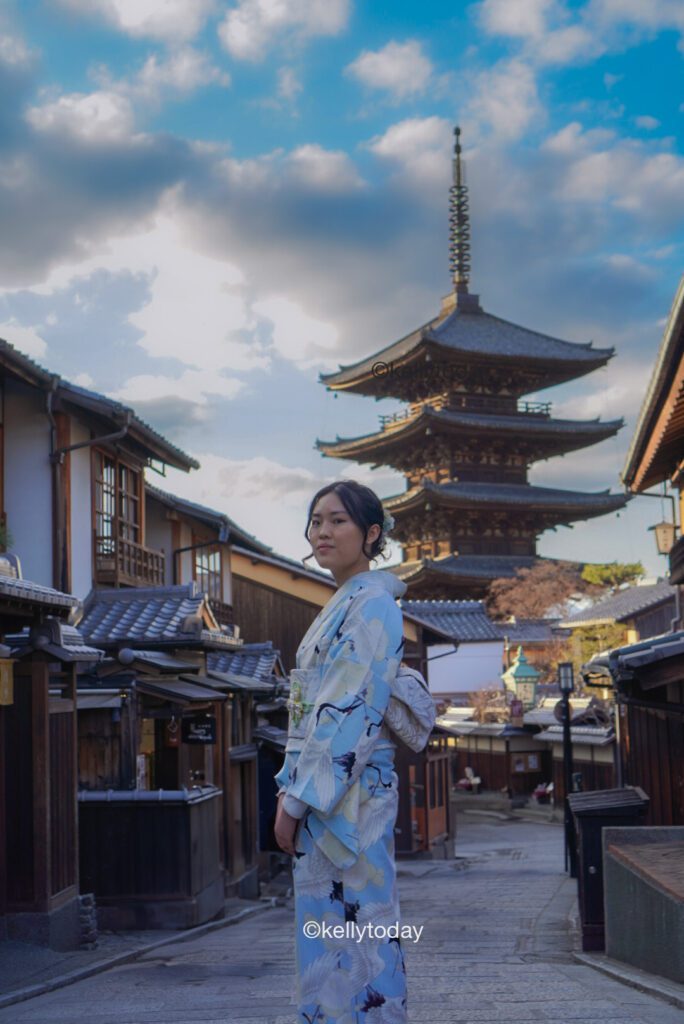
Make sure to do your research on the location you want to photograph. This includes the times you should visit the area without the crowds, whether it’s waking up early in the day or going later. The time you choose to take your photos is important for several reasons. Firstly, the amount of people can differ which will make a difference in them showing up in your photos. Secondly, with fewer people around you’re less likely to feel embarrassed parading around in public in front of your tripod because no one else will see it. Timing is also important because when you can visit a spot with fewer crowds it can help lessen your anxiety about your camera getting stolen.
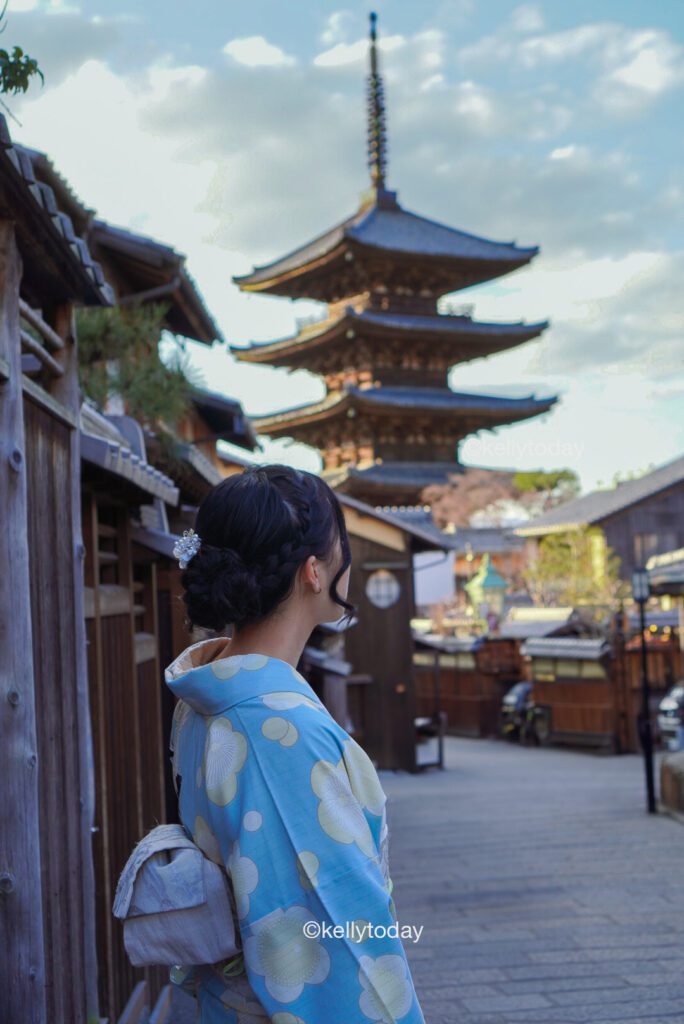
How To Now Look Awkward in Photos

We’ve covered how to set up taking your photos of yourself on your travels now let’s discuss how not to look awkward in your photos. Here are some helpful tips for photographing yourself travelling alone in an authentic and candid way. These photo tips can also be applied when taking photos of yourself at home.

Use a Prop

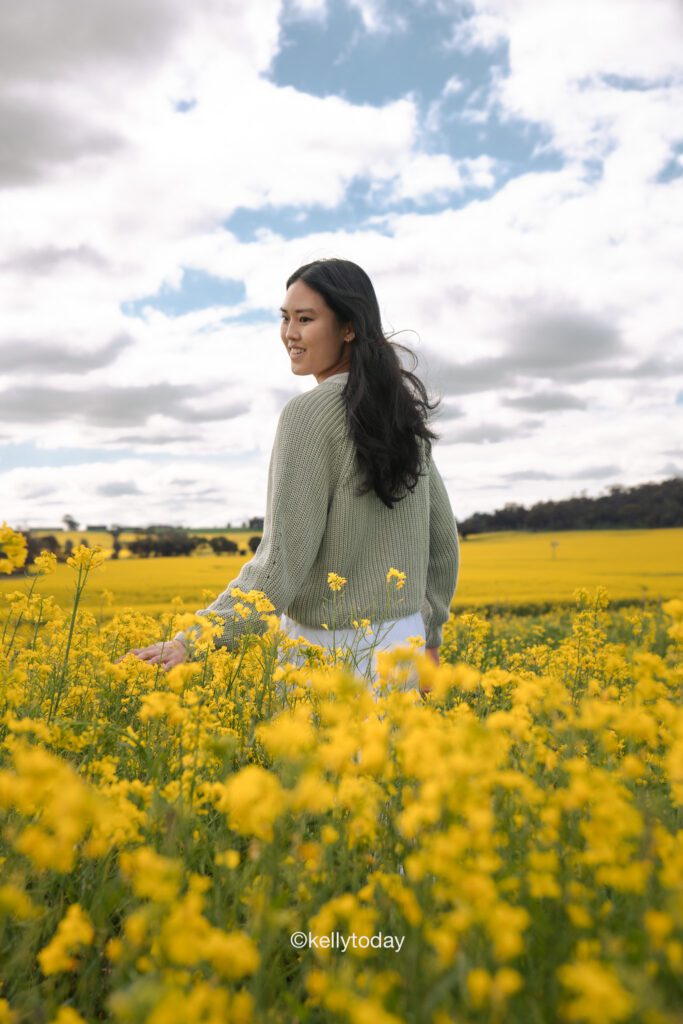
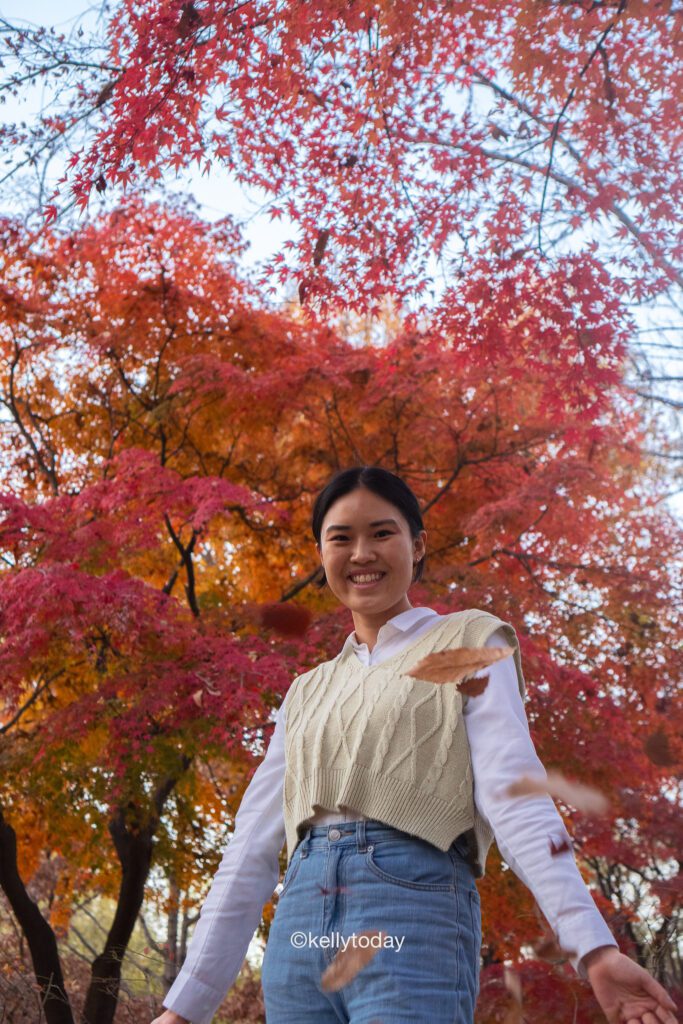
One handy trick to not looking awkward in photos is by utilising a prop. Often most people feel awkward in positioning their hands in photos and holding onto an item can make your photo look more natural. Examples of props you can use include drinks, hats, sunglasses, the list goes on. Alternatively, you can also interact with your surroundings such as reaching out to touch something in your environment like throwing loose leaves. This can make your photos more natural and fun in your photographs.
Sitting Down

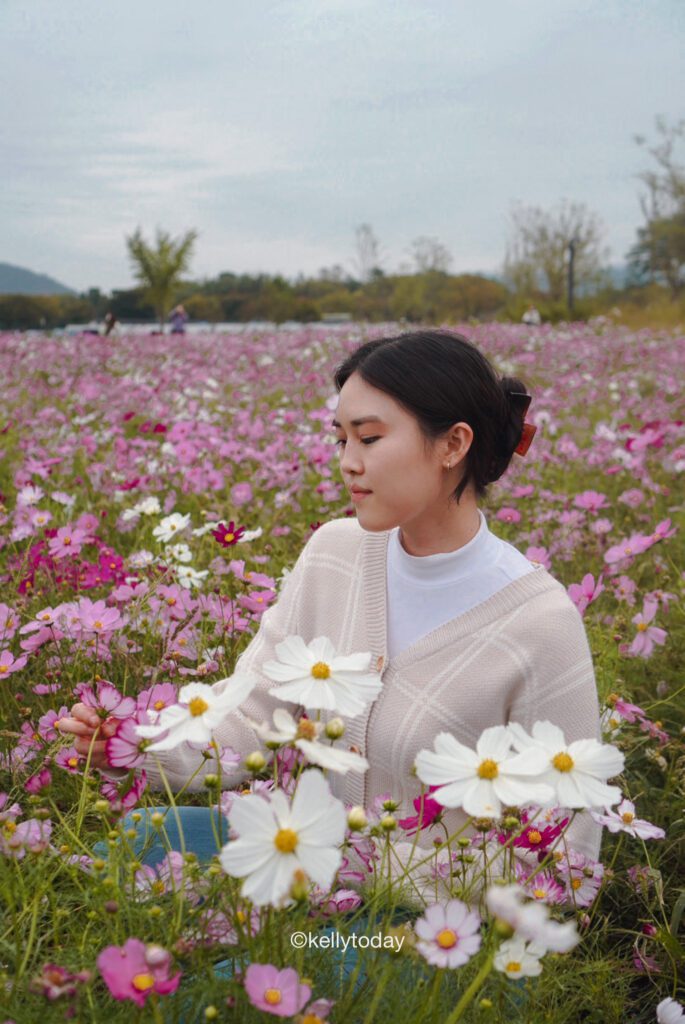
If you’re feeling a bit awkward standing and taking your photos why not sit down? Experiment with different angles in a sitting-down pose. Whether it’s sitting down looking at the camera or looking at a gorgeous view this is a great alternative for those not wanting to just stand stiff in front of the camera. It’s also helpful to practice and learn which angles of your face or body you feel most comfortable photographing. It will feel awkward at first but you get used to it over time. Just remind yourself these photos will be worth the memories!

Incorporate Movement

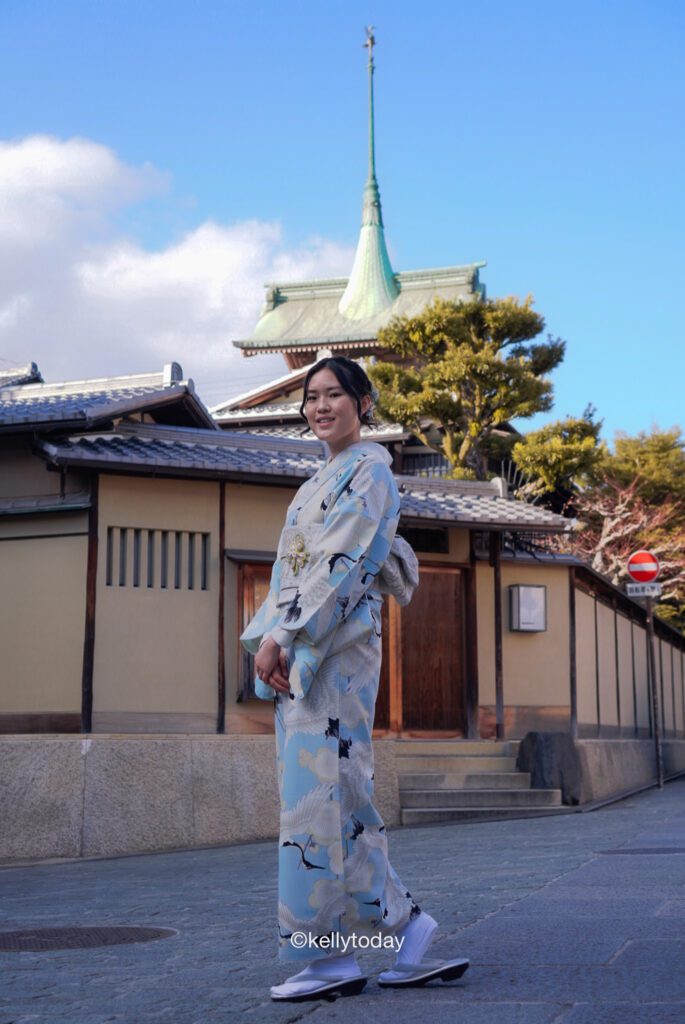
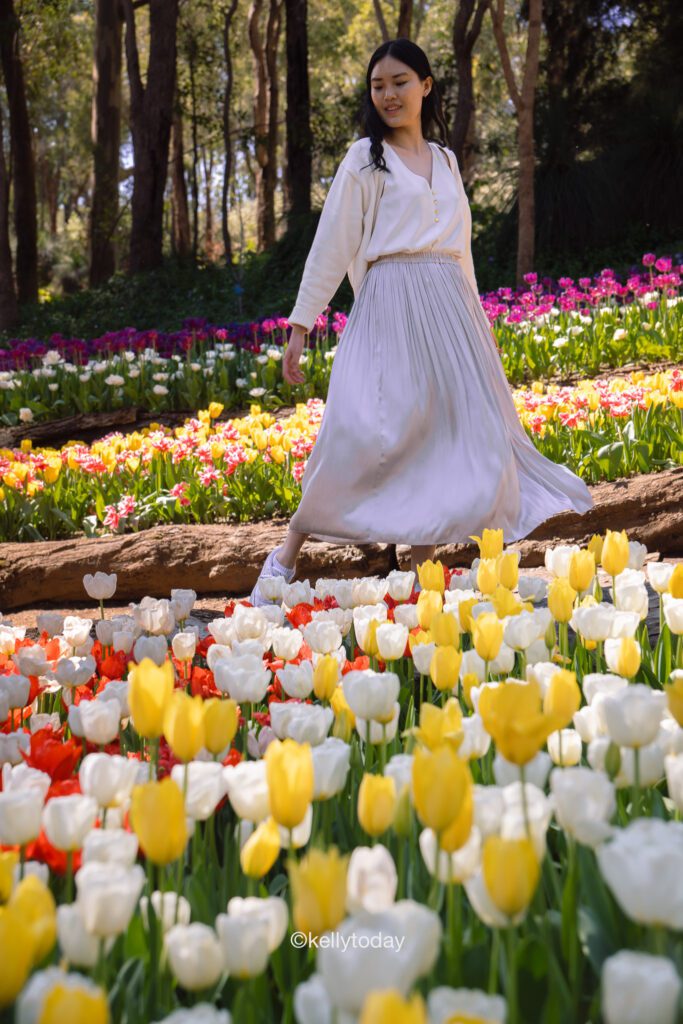
One of the most common mistakes people make when taking photos of themselves is not incorporating movement in their photos. Simple movements like walking or twirling are a great way to make your photos less ‘planned’ out and more natural. To best capture movement in your photos it’s always best to set up your camera or phone with a self-timer, burst mode or interval shooting to take photos every second. Using this method you’re more likely to get a dynamic photo that captures movement.

For those who are still a bit shy about taking self-portraits, try the ‘walking away from the camera’ pose to get a candid photo coupled with a self-timer. My best advice for this method is to try walking forward and backward a couple of times whilst the camera is set up for interval shooting.
Get Creative With Your Hands

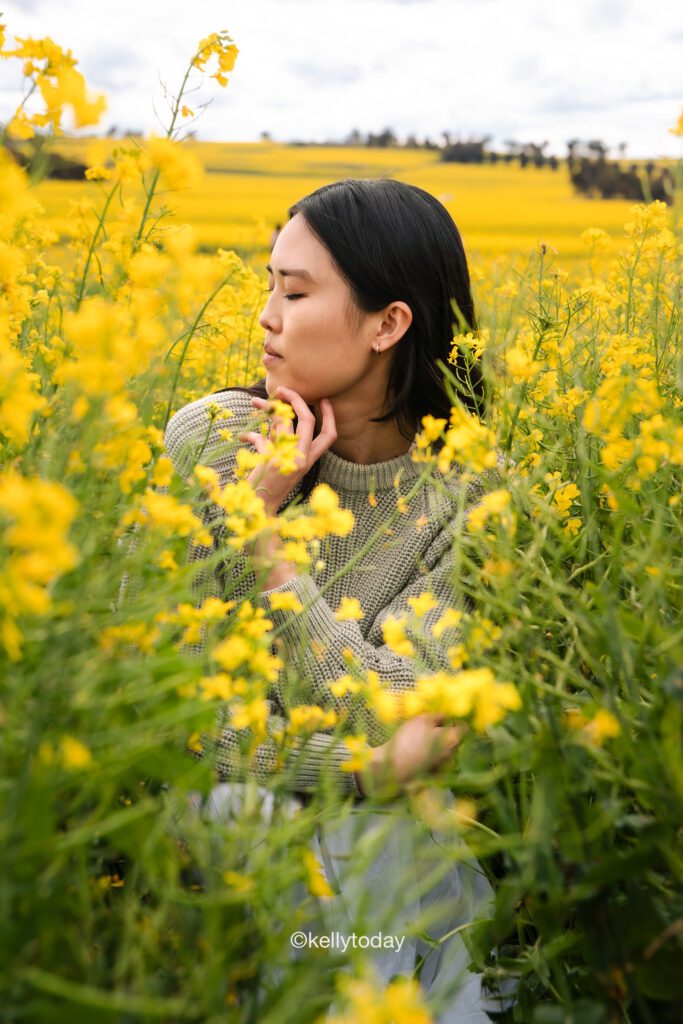
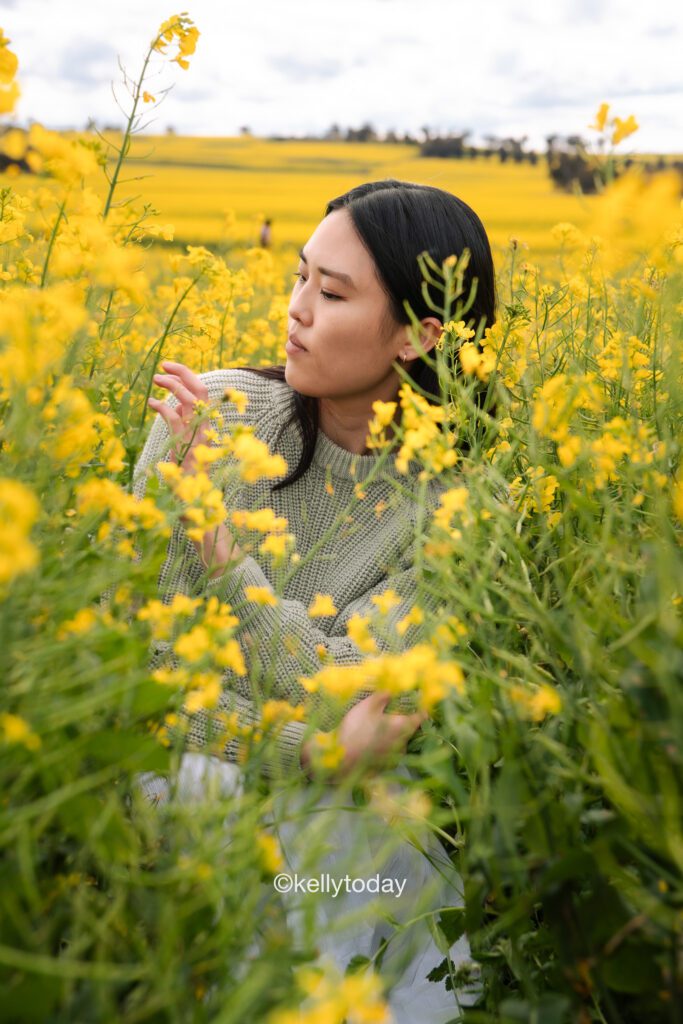
Another handy trick to looking candid in your photos is by experimenting with the positions of your hands in your photos. This includes playing with your hair, putting it under your chin, the list goes on. This method also goes well with alternating different poses or movements when you’re taking your photos. It doesn’t have to be major movements like jumping but changing the positioning of your face, legs, and arms or simply looking at a different angle. Another helpful tip is to practice finding your best angles so you know which angles to best photograph.
Watch Out For Your Camera

As always, remember to be aware of your surroundings not just taking your photos but in general. Always remember where your valuables are at all times and plan out the timing of your photo shooting locations. If you’re taking photos during the day at a popular attraction, choose to take photos where you’re only a short distance from your camera for a few seconds. This way you don’t have to worry about your camera getting bumped or worst case stolen. Generally, if you want to avoid this feeling it’s always best to visit these well-known tourist spots early in the day or you can find alternative lesser-known spots to photograph.

Back It Up

Don’t learn the hard way of losing all your photos from a trip. Always remember to back up your photos and videos of your travels. Here are some handy ways to back up your photos from your phone or camera.

  • Use Google Photos – This is a free app that automatically backups your photos with WiFi and/or data. After you’ve uploaded these photos you can also access them from any phone or computer with your login information. This is really handy if you lose or break your phone.
  • Upload it to your tablet or laptop – Always back up your photos on a laptop or tablet as soon as possible.
  • Use a hard drive – If you take lots of photos, then the best option is to invest in a hard drive. I always recommend buying a hard drive or SSD with storage of 2TB (2000 GB) so I have plenty of storage to store both my photos and videos.

Practice Makes Perfect

It seems obvious but only through practice will you improve in photography and feel more comfortable taking photos of yourself in public. If I look back at my photos when I first started, they were so awkward, out of focus, underexposed, and the list goes on! Remember that photography is a learning process and it takes time before you see yourself improving. If you found these tips helpful don’t forget to download my free photography guide. I share fundamental photography tips that help you start your photography journey to take better photos of your travels, life, family, and everything in between.

Frequently Asked Questions

How do you edit your photos?

Editing your photos is a great way to portray a specific mood and personalise your photos to your preference. I generally avoid phone and Instagram filters as they’re quite limiting. I always use Adobe Lightroom to adjust specific elements of my photos based on my preferences. This app is free to download and you can adjust settings from everything including clarity, exposure and colouring of the photo.

Is there an app to take pictures of yourself alone?

For Samsung users, I recommend using the pre-existing camera app on the phone. Utilise the ‘palm gesture‘ feature on the camera app which allows you to take selfies or start recording selfie videos once activated by showing your palm to the camera.

For iPhone users, I recommend downloading the photo app Lens Buddy which is a timer camera app that helps you take hands-free photos and selfies.

What is the best tripod for solo travel photography?

I personally use two different tripods when taking my photos by myself. The first is a full-sized Manfrotto tripod which is very light and sturdy. Whilst it is a bit bulky to carry around I usually only use this when shooting photos on a day trip from home.

The second tripod I use is a compact tripod with bendable legs, the Joby Gorillapod. This tripod is more portable than a full-length tripod with flexibility in propping my camera on multiple surfaces or wrapping the tripod legs around something like a tree branch of poll. It’s also one of the best tripods if you’re moving from different places as you don’t have time to set it up and take down your tripod every time you want to take a photo. This tripod is also compatible with smartphones.

Found this helpful? 👇🏼

Found this free guide helpful? Support my work so I can produce more free content for you.

📌 Click on this pin to save this article for later.

How To Take Photos Of Yourself as a Solo Traveller

Posted By: kellytoday · In: Blog, Photography, Travel Tips & Guides

20 Best Places to Visit in Korea in Winter
20 Of The Best Winter Festivals in South Korea

You’ll Also Love

15 Best Day trips from Seoul in South Korea.15 Best Day Trips from Seoul & How To Get There
Helpful Things to Know When Travelling to Japan20 Helpful Things to Know When Travelling to Japan
10 Best Day Trips from Fukuoka Japan10 Day Trips from Fukuoka That’s Worth Your Time

Comments

  1. Anja says

    November 23, 2023 at 3:58 pm

    What a great detailed post! Very helpful, thank you for sharing! Never been good taking photos of myself, so lots to learn here.

    Log in to Reply
  2. Angela Price says

    November 23, 2023 at 6:19 pm

    If you can’t find a passer-by to take a photo of you then it is often down to selfies which aren’t always successful so your guide gives a good round-up of tips and equipment to get that good solo photo.

    Log in to Reply
  3. Saunter With Sanika says

    November 23, 2023 at 7:41 pm

    I absolutely love solo photography, it gives me so many opportunities to test my creativity. I’ve recently started playing around with a GoPro and you’re right, its so useful!

    Log in to Reply
  4. Jennifer Record says

    November 25, 2023 at 1:16 am

    Great advice! I don’t travel along often, but I do sometimes explore for a bit on my own and photos are terrible..tripod is a great idea..and I am going to try out the angles…. hoping for better photos!

    Log in to Reply
  5. Ashlea says

    November 27, 2023 at 10:28 pm

    I almost always travel with someone, but these tips can be used when traveling with other people too. Thanks for sharing!

    Log in to Reply
  6. Lenore says

    November 28, 2023 at 11:18 am

    Great tips on catching the perfect photo! I utilize some of them on my travels.

    Log in to Reply
  7. sarah says

    November 28, 2023 at 2:50 pm

    Some great tips here. I must get myself a tripod.

    Log in to Reply
  8. Jaqueline says

    November 29, 2023 at 2:06 am

    Thank you for this blog post! I loved all your pictures and the aesthetic of them, they‘re very inspirational 🙂

    Log in to Reply
  9. MicheleinPlaya says

    January 4, 2024 at 11:19 pm

    I am admittedly rubbish at taking photos of myself. It doesn’t help that my boyfriend mocks me whenever he catches me taking a selfie and then photographs me doing it!! LOL. Your photos are stunning so good for you! I’ll be sure to try some of your tips.

    Log in to Reply

Leave a Reply Cancel reply

You must be logged in to post a comment.

Hi, I'm Kelly! I'm an Asian Australian content creator from Western Australia. I inspire others to get outside and explore the world. Join my adventures and discover my best travel & photography tips!

Map Travel Guide

Map Travel Guide

Join the community!

Subscribe to access the latest travel tips, discount codes & updates about group trips & product releases!

Follow me on IG @kellytoday

What happens when you ignore popular advice in you What happens when you ignore popular advice in your twenties? 👉🏻

I’ve also included some helpful resources that have helped me with financial literacy and upskilling throughout my twenties. 🙇🏻‍♀️📚

💌 If you enjoyed this post, I have a weekly newsletter sharing more tips and advice about financial literacy and navigating your twenties. You can sign up using the link in my bio.

#twenties #europe #livingabroad 

It’s more common than you think to end up in a career unrelated to what you studied at university.

Work experience is just as important, if not more important, when applying for opportunities. 

Take advantage of free and paid resources online to upskill and learn about different topics. 

If I could redo my twenties, I’d prioritise learning more about financial literacy, especially investing. Here are a few videos that I've found are helpful. 

Even while working full-time, I’ve always tried to make time for travel instead of waiting until I’m older. As a general rule, any money I earn outside of my full-time job either goes towards investing or my travel fund.

The reality is that social media has made it easier than ever to monetise your content.

I started my account in 2022, and it’s taken time to grow my platforms and develop the skills I now use to secure paid collaborations.

In the current climate, it’s becoming more common to have multiple income streams, whether that’s working multiple jobs or developing a side hustle.

Building additional income streams can give you more flexibility and reduce your reliance on a single source of income, such as a full-time job.

💸 If you want advice on developing passive income streams, I’ve written an article on my Substack sharing my own income streams and tips for getting started. 💸

The reality is that your twenties are your first decade as an adult.

It’s completely normal not to know exactly what you want to do or where you want life to take you.

Stay curious. Try different things. Learn along the way.

If you’re looking to start investing, here are some beginner-friendly books to check out. 📚

I use @pearlerhq to invest in ETFs and stocks.

I like that you can automate your investments throug
Which one surprised you the most? 👀 4 things I qu Which one surprised you the most? 👀

4 things I quietly stopped doing this year to save money — and what I do instead.

Most of these came from adopting more of an underconsumption mindset this year. If you found this helpful, a low-buy (or no-buy) approach might be worth trying too.

What’s something you’ve stopped buying this year? Tell me below 👇

#habits #underconsumption #europe 

Instead of buying books, I borrow free books and audiobooks through the @libby.app. Libby automatically syncs to my Kobo Clara eReader from @kobobooks and @kobobooks_au. 📚

I usually read about 2 to 7 books each month, so this is helping me cut costs for this hobby.

🛍️ Cutting out impulse purchases because an item is on sale can save you money. It’s been helpful in reducing these purchases by using a wishlist on @notionhq. I’ve linked my template in my bio if you want to use it. 

🙅🏻‍♀️ Take it a step further by waiting at least 7 to 30 days before buying an item. Usually, this time lets you either forget about the purchase or realise you don’t really need it. 

📖 Both apps don’t require any fees to use. But it’s saved me money in the sense that I’ve been able to monetise my Notion reading template as a digital product. I’ve linked my reading Notion tracker in my bio. 

☕️ Instead of buying a takeaway coffee or tea every time I’m at the office. I would’ve saved about $520 each year. Instead, I’d rather use this for a cheaper option to make a drink at home and bring it into the office and then use the difference for investing. 

I’ve been using @pearler to automate my monthly investments.

💵 Best advice for those who want to start investing is that you can never really time the market. Dollar cost averaging is the investing strategy I’m doing in my twenties. 

The graph is sourced from TabTrader.

Compound interest is your best friend over time. 

For example, a $500/month investment strategy over 30 years ($180,000 total contributions) could have grown an initial $1,000 investment to $823,114 based on historical market performance. 

This graph shows how consistent investing, combined with time in the market, can make a difference.

Source: Vanguard. Based on the S&P/ASX
📝 Part 10 of the media I consumed this week that s 📝 Part 10 of the media I consumed this week that sparked my curiosity 🙇🏻‍♀️

Here’s some media to help you be more intentional with your time — swap the doomscrolling for thoughtful articles that actually stay with you. 🌱

A roundup of what’s worth consuming when you want to learn something new and give your brain a little spark. ✨📚

💌 If this resonates, I share weekly recommendations (books, films, articles, podcasts + more) in my newsletter. You can sign up through the link in my bio.

💭 You can sign up for my newsletter to receive the full list of media featured here.

📝 Comment 'list' and I'll send you all the links for the media in this carousel.

#reading #whattoread #habits
Can you guess which places made the list? 🇯🇵✨ Aft Can you guess which places made the list? 🇯🇵✨

After 4 trips to Japan, these are some of my favourite places I’ve visited — and the ones I’d happily return to again and again.

💭 Have you been to any of these spots?

📷 Photos edited using my Fujifilm Lightroom presets (linked in my bio)

#japan #asia #asiatravel #travelphotography #bucketlist @lightroom @visitjapanau @visitjapanjp 

Located in southern Fukuoka Prefecture, Yanagawa is often called the “Venice of Kyushu” thanks to its charming network of waterways.

Once a historic castle town, this scenic destination is known for its rich history and traditional boat rides along the narrow canals. Hop on a small donko-bune boat and enjoy a slower-paced side of Japan.

If you visit, don’t leave without trying eel (unagi) — Yanagawa’s signature dish and a must-try for food lovers.

@welcomekyushu @kyushu_tourism_information

A classic for a reason — Kyoto is one of those places that most first-time visitors add to their Japan itinerary, and it’s completely worth the hype.

After visiting Japan 4 times, I still find myself discovering new places to explore in Kyoto, and each season brings a completely different experience.

Once the capital of Japan, Kyoto is filled with endless things to see and do — from historic temples and traditional neighbourhoods to incredible food spots and beautiful landscapes.

@visit_kyoto

I wish I had spent even more time in this city!

As the capital of Fukuoka Prefecture, Fukuoka is known for its incredible food scene, ancient temples, vibrant neighbourhoods, and beautiful coastal scenery.

I spent around a week exploring the city, but it’s also the perfect base for day trips around the prefecture and wider Kyushu region.

@visitfukuoka 

Add this UNESCO World Heritage Site to your Japan itinerary!

Shirakawa-go is one of those places that feels like stepping into a storybook, with its traditional thatched-roof houses and beautiful mountain scenery.

I visited during summer, but I’d love to return in another season — especially to see the village covered in snow during winter.

The easiest way to reach Shirakawa-go is by bus from Takayama.

From Nagoya or Gifu, take the JR
🙇🏻‍♀️ I spent my twenties doing things a little di 🙇🏻‍♀️ I spent my twenties doing things a little differently. Here’s what happened. 👉🏻

Here are some unconventional things I’ve done in my twenties that have paid off and are also helping me set myself up for the future. 

Some decisions looked risky at the time… but ended up creating opportunities I never expected. 

#twenties #livingabroad #europe 

This wasn’t the easiest decision, but when COVID hit and I lost a family member, I realised how short life can be.

I decided to take time away from university and explore a different path. I ended up finding a job overseas that allowed me to work while travelling in my free time.

I completed my TEFL qualification to help me secure a job in South Korea. I’ve shared my free guide to landing a job in Korea on my website. 

📌 If you are interested, teaching English is one of the more accessible pathways for foreigners looking to work in Korea.

I started this account in 2022, and it has grown across multiple social platforms, reaching around 80K followers.

It’s been a slow process of staying consistent, learning along the way, and constantly pushing myself outside my comfort zone.

I honestly believe experience is becoming just as important, if not more important, when applying for new opportunities.

I don’t have a formal degree in marketing or social media, but I was able to use my portfolio and experience as a content creator to land a full-time role in digital marketing — something I’m incredibly grateful for.

Since the pandemic, I think many of us have realised how quickly industries can change and how much budgets can impact jobs and resources.

It reminded me of the importance of building income streams outside of your main salary. The extra income has also helped me reach my financial goals faster and gives me more flexibility in the future.

I regularly take free courses, but when I find a course that provides genuine value, I’m happy to invest in it. For example, I completed a beginner investing course that helped me feel more confident investing in stocks and ETFs.

Here are a few free resources you can explore in your own time.

There are also two posts on my profile recommending lists of FREE re
Part 2 is here because there are far too many incr Part 2 is here because there are far too many incredible free resources to fit into one post. 📚✨

One of the biggest things I've learnt is that reading doesn't have to mean sitting down with a 400-page book every night. Learning can happen through essays, newsletters, library apps, audiobooks, public domain classics, and thoughtfully curated recommendations. It all counts.

The easier you make it to discover something interesting, the more likely you are to stay curious. Sometimes the difference between reading more and reading less isn't motivation—it's simply having the right resources waiting for you.

These are a few more free tools and platforms that have helped me find books, learn new things, and spend less time endlessly scrolling for something worthwhile.

Save this post for the next time you're looking for something new to read, learn, or explore.

#reading #habits 

The @literaryhub publishes thoughtful essays, author interviews, book recommendations, and literary conversations that make reading feel even richer. 

Interesting articles I've read from @literaryhub. 

🔍 Etymonline

Ever wondered where a word actually came from? Type in any English word and discover its origins, history, and how its meaning has changed over time.

🎓 MIT OpenCourseWare

Access free course materials from one of the world's leading universities. Explore thousands of MIT classes with lecture notes, assignments, and learning resources across countless subjects.

📰 SmartNews

A simple way to stay informed. Follow the topics you care about, customise your feed, and read headlines from a range of trusted news publishers all in one place.

🌍 Radio Garden 

Travel the world without leaving your room. Spin the globe and tune into live radio stations from thousands of cities to discover new music, languages, and cultures.

📖 Project Gutenberg

A treasure trove of free books. Browse over 75,000 classic eBooks, download them to your Kindle or phone, or read them online whenever you like.

Track all your reading stats on @the.storygraph 📚

📝 Word of the Day

Build your vocabulary without feeling like you're studying. Learn one new word each day with definitions, examples, and q
The things I never expected to be grateful for aft The things I never expected to be grateful for after moving to South Korea. 👉🏻

This carousel is a little reminder that sometimes the biggest gifts from a chapter of your life aren’t the ones you were looking for—they’re the ones you never saw coming.

These are just a few reflections from my time living abroad in Korea. What I didn’t expect were the things you can’t really plan for.

The quiet moments that slowly change you. The lessons you only learn by living somewhere unfamiliar. The parts of yourself you don’t discover until you’re far away from everything you’ve ever known.

If you’ve ever moved abroad, travelled solo, or taken a leap that scared you, I’d love to know:

💭 What’s something you’re grateful you gained that you never expected?

📌 If you’re thinking about working in Korea, I’ve got a free guide on my website about how I got my job in South Korea for your reference. 

#livingabroad #southkorea #seoul 

Prior to the move, I had quit university and was job searching for positions in South Korea.

I was pretty lucky to connect with some genuine people overseas. I've heard from others and online that making friends in Korea can be difficult. 

Before I left some of my coworkers gave me going away presents which I wasn't expecting at all. 

One of my coworkers even handwrote a heartfelt message on the gift.

Most of the time I'd spend my weekends exploring a different region or city. 

Random viewpoint I found when I did a weekend trip in Jeonju.

One of unexpected perks of my job was being invited to work excursions which meant I got to see some new places around Korea. 

Hard to pick a favourite season in Korea. It's probably a tie between autumn or spring. 

Before I moved I took online Korean lessons but the language barrier was still a bit of a shock. 

One of my favourite things to do alone was exploring either my local area or cafe hopping. 

Even everyday tasks were a bit more challenging with the language barrier. 

There's definitely a learning curve once you move to a new place. Just remember to be patient with yourself while you're adjusting.

A friend took this photo after we got dropped off at a hotel.  I promise you those are not
🙇🏻‍♀️ Part 14 of media to read in your twenties ✨ 🙇🏻‍♀️ Part 14 of media to read in your twenties ✨
Here’s your next round of long-form reads for navigating your twenties.

💌 Enjoyed this post? I share weekly media recommendations (books, films, articles, podcasts & more) in my newsletter—link in bio if you’d like to join.

💡 Want even more? Check out my full “media to consume instead of doom-scrolling” series on my profile.

💭 Want the links for these articles? Sign up for my newsletter for the full list of articles + essays featured here.

#twenties #whattoread #articles
Swipe for a peek through my camera roll in Switzer Swipe for a peek through my camera roll in Switzerland 📸✨

I finally gave this “what you see vs what I took” trend a go, which gave me an excuse to dig into my Europe travel archives to match real-life moments with the photos and videos I came home with.

It’s always interesting comparing the scene in front of me with the final image — sometimes the difference comes down to a small change in perspective, framing, or zoom.

A few tips for getting similar shots:

📷 I usually shoot on either my @Sony camera or @Samsung phone. When I'm using my camera, having a zoom lens makes a huge difference for capturing details, architecture, and subjects that are further away.

✨ My go-to travel lens is the @tamronaus 17–70mm. It’s incredibly versatile and lets me switch between landscapes, portraits, street scenes, and architecture without constantly changing lenses.

🔍 Don't be afraid to use zoom. Whether you're shooting on a camera or your phone, some scenes look much stronger when you zoom in slightly (2x–4x) to simplify the composition and draw attention to your subject.

📸 Photos were edited in Lightroom using my presets (linked in my bio)

#europe #switzerland #travelphotography #bucketlist @lightroom

One of the most popular views you'll see of Lauterbrunnen online. You'll want to visit early in the morning to avoid the crowds. 🤭

This street was once awarded the "most beautiful street" in Europe.

Views after the ride up to the toboggan ride in Grindelwald. This was taken around midday so the lighting was a bit harsh.

Iconic shot of the locals of Switzerland. 🐄🐮

Found this viewpoint with now crowds in Grindelwald. Best spot for a sunrise or sunset.

This was taken near the toboggan ride in Grindelwald.

One of my favourite viewpoints in Wengen.

Found this helpful? 👀 

I've got guides on my profile to help you with:

📷 Editing your photos on your phone

🗺 Planning a trip to Switzerland or you can comment "GUIDE" and i'll send you my 1 week travel itinerary.

Travel More

Explore Categories

  • Free Resources
  • Blog
  • Travel
  • Travel Tips & Guides
  • Photography
  • Working Abroad

Support my work

Recent Posts

  • 15 Best Day Trips from Seoul & How To Get There
  • 20 Helpful Things to Know When Travelling to Japan
  • 10 Day Trips from Fukuoka That’s Worth Your Time
  • 13 Best Christmas Romance Books You’ll Want to Read in One Sitting
  • 16 Romance Books About Second Chances You’ll Wish You Read Sooner

travel more

300*250
What happens when you ignore popular advice in you What happens when you ignore popular advice in your twenties? 👉🏻

I’ve also included some helpful resources that have helped me with financial literacy and upskilling throughout my twenties. 🙇🏻‍♀️📚

💌 If you enjoyed this post, I have a weekly newsletter sharing more tips and advice about financial literacy and navigating your twenties. You can sign up using the link in my bio.

#twenties #europe #livingabroad 

It’s more common than you think to end up in a career unrelated to what you studied at university.

Work experience is just as important, if not more important, when applying for opportunities. 

Take advantage of free and paid resources online to upskill and learn about different topics. 

If I could redo my twenties, I’d prioritise learning more about financial literacy, especially investing. Here are a few videos that I've found are helpful. 

Even while working full-time, I’ve always tried to make time for travel instead of waiting until I’m older. As a general rule, any money I earn outside of my full-time job either goes towards investing or my travel fund.

The reality is that social media has made it easier than ever to monetise your content.

I started my account in 2022, and it’s taken time to grow my platforms and develop the skills I now use to secure paid collaborations.

In the current climate, it’s becoming more common to have multiple income streams, whether that’s working multiple jobs or developing a side hustle.

Building additional income streams can give you more flexibility and reduce your reliance on a single source of income, such as a full-time job.

💸 If you want advice on developing passive income streams, I’ve written an article on my Substack sharing my own income streams and tips for getting started. 💸

The reality is that your twenties are your first decade as an adult.

It’s completely normal not to know exactly what you want to do or where you want life to take you.

Stay curious. Try different things. Learn along the way.

If you’re looking to start investing, here are some beginner-friendly books to check out. 📚

I use @pearlerhq to invest in ETFs and stocks.

I like that you can automate your investments throug
Which one surprised you the most? 👀 4 things I qu Which one surprised you the most? 👀

4 things I quietly stopped doing this year to save money — and what I do instead.

Most of these came from adopting more of an underconsumption mindset this year. If you found this helpful, a low-buy (or no-buy) approach might be worth trying too.

What’s something you’ve stopped buying this year? Tell me below 👇

#habits #underconsumption #europe 

Instead of buying books, I borrow free books and audiobooks through the @libby.app. Libby automatically syncs to my Kobo Clara eReader from @kobobooks and @kobobooks_au. 📚

I usually read about 2 to 7 books each month, so this is helping me cut costs for this hobby.

🛍️ Cutting out impulse purchases because an item is on sale can save you money. It’s been helpful in reducing these purchases by using a wishlist on @notionhq. I’ve linked my template in my bio if you want to use it. 

🙅🏻‍♀️ Take it a step further by waiting at least 7 to 30 days before buying an item. Usually, this time lets you either forget about the purchase or realise you don’t really need it. 

📖 Both apps don’t require any fees to use. But it’s saved me money in the sense that I’ve been able to monetise my Notion reading template as a digital product. I’ve linked my reading Notion tracker in my bio. 

☕️ Instead of buying a takeaway coffee or tea every time I’m at the office. I would’ve saved about $520 each year. Instead, I’d rather use this for a cheaper option to make a drink at home and bring it into the office and then use the difference for investing. 

I’ve been using @pearler to automate my monthly investments.

💵 Best advice for those who want to start investing is that you can never really time the market. Dollar cost averaging is the investing strategy I’m doing in my twenties. 

The graph is sourced from TabTrader.

Compound interest is your best friend over time. 

For example, a $500/month investment strategy over 30 years ($180,000 total contributions) could have grown an initial $1,000 investment to $823,114 based on historical market performance. 

This graph shows how consistent investing, combined with time in the market, can make a difference.

Source: Vanguard. Based on the S&P/ASX
📝 Part 10 of the media I consumed this week that s 📝 Part 10 of the media I consumed this week that sparked my curiosity 🙇🏻‍♀️

Here’s some media to help you be more intentional with your time — swap the doomscrolling for thoughtful articles that actually stay with you. 🌱

A roundup of what’s worth consuming when you want to learn something new and give your brain a little spark. ✨📚

💌 If this resonates, I share weekly recommendations (books, films, articles, podcasts + more) in my newsletter. You can sign up through the link in my bio.

💭 You can sign up for my newsletter to receive the full list of media featured here.

📝 Comment 'list' and I'll send you all the links for the media in this carousel.

#reading #whattoread #habits
Can you guess which places made the list? 🇯🇵✨ Aft Can you guess which places made the list? 🇯🇵✨

After 4 trips to Japan, these are some of my favourite places I’ve visited — and the ones I’d happily return to again and again.

💭 Have you been to any of these spots?

📷 Photos edited using my Fujifilm Lightroom presets (linked in my bio)

#japan #asia #asiatravel #travelphotography #bucketlist @lightroom @visitjapanau @visitjapanjp 

Located in southern Fukuoka Prefecture, Yanagawa is often called the “Venice of Kyushu” thanks to its charming network of waterways.

Once a historic castle town, this scenic destination is known for its rich history and traditional boat rides along the narrow canals. Hop on a small donko-bune boat and enjoy a slower-paced side of Japan.

If you visit, don’t leave without trying eel (unagi) — Yanagawa’s signature dish and a must-try for food lovers.

@welcomekyushu @kyushu_tourism_information

A classic for a reason — Kyoto is one of those places that most first-time visitors add to their Japan itinerary, and it’s completely worth the hype.

After visiting Japan 4 times, I still find myself discovering new places to explore in Kyoto, and each season brings a completely different experience.

Once the capital of Japan, Kyoto is filled with endless things to see and do — from historic temples and traditional neighbourhoods to incredible food spots and beautiful landscapes.

@visit_kyoto

I wish I had spent even more time in this city!

As the capital of Fukuoka Prefecture, Fukuoka is known for its incredible food scene, ancient temples, vibrant neighbourhoods, and beautiful coastal scenery.

I spent around a week exploring the city, but it’s also the perfect base for day trips around the prefecture and wider Kyushu region.

@visitfukuoka 

Add this UNESCO World Heritage Site to your Japan itinerary!

Shirakawa-go is one of those places that feels like stepping into a storybook, with its traditional thatched-roof houses and beautiful mountain scenery.

I visited during summer, but I’d love to return in another season — especially to see the village covered in snow during winter.

The easiest way to reach Shirakawa-go is by bus from Takayama.

From Nagoya or Gifu, take the JR
🙇🏻‍♀️ I spent my twenties doing things a little di 🙇🏻‍♀️ I spent my twenties doing things a little differently. Here’s what happened. 👉🏻

Here are some unconventional things I’ve done in my twenties that have paid off and are also helping me set myself up for the future. 

Some decisions looked risky at the time… but ended up creating opportunities I never expected. 

#twenties #livingabroad #europe 

This wasn’t the easiest decision, but when COVID hit and I lost a family member, I realised how short life can be.

I decided to take time away from university and explore a different path. I ended up finding a job overseas that allowed me to work while travelling in my free time.

I completed my TEFL qualification to help me secure a job in South Korea. I’ve shared my free guide to landing a job in Korea on my website. 

📌 If you are interested, teaching English is one of the more accessible pathways for foreigners looking to work in Korea.

I started this account in 2022, and it has grown across multiple social platforms, reaching around 80K followers.

It’s been a slow process of staying consistent, learning along the way, and constantly pushing myself outside my comfort zone.

I honestly believe experience is becoming just as important, if not more important, when applying for new opportunities.

I don’t have a formal degree in marketing or social media, but I was able to use my portfolio and experience as a content creator to land a full-time role in digital marketing — something I’m incredibly grateful for.

Since the pandemic, I think many of us have realised how quickly industries can change and how much budgets can impact jobs and resources.

It reminded me of the importance of building income streams outside of your main salary. The extra income has also helped me reach my financial goals faster and gives me more flexibility in the future.

I regularly take free courses, but when I find a course that provides genuine value, I’m happy to invest in it. For example, I completed a beginner investing course that helped me feel more confident investing in stocks and ETFs.

Here are a few free resources you can explore in your own time.

There are also two posts on my profile recommending lists of FREE re
Part 2 is here because there are far too many incr Part 2 is here because there are far too many incredible free resources to fit into one post. 📚✨

One of the biggest things I've learnt is that reading doesn't have to mean sitting down with a 400-page book every night. Learning can happen through essays, newsletters, library apps, audiobooks, public domain classics, and thoughtfully curated recommendations. It all counts.

The easier you make it to discover something interesting, the more likely you are to stay curious. Sometimes the difference between reading more and reading less isn't motivation—it's simply having the right resources waiting for you.

These are a few more free tools and platforms that have helped me find books, learn new things, and spend less time endlessly scrolling for something worthwhile.

Save this post for the next time you're looking for something new to read, learn, or explore.

#reading #habits 

The @literaryhub publishes thoughtful essays, author interviews, book recommendations, and literary conversations that make reading feel even richer. 

Interesting articles I've read from @literaryhub. 

🔍 Etymonline

Ever wondered where a word actually came from? Type in any English word and discover its origins, history, and how its meaning has changed over time.

🎓 MIT OpenCourseWare

Access free course materials from one of the world's leading universities. Explore thousands of MIT classes with lecture notes, assignments, and learning resources across countless subjects.

📰 SmartNews

A simple way to stay informed. Follow the topics you care about, customise your feed, and read headlines from a range of trusted news publishers all in one place.

🌍 Radio Garden 

Travel the world without leaving your room. Spin the globe and tune into live radio stations from thousands of cities to discover new music, languages, and cultures.

📖 Project Gutenberg

A treasure trove of free books. Browse over 75,000 classic eBooks, download them to your Kindle or phone, or read them online whenever you like.

Track all your reading stats on @the.storygraph 📚

📝 Word of the Day

Build your vocabulary without feeling like you're studying. Learn one new word each day with definitions, examples, and q
The things I never expected to be grateful for aft The things I never expected to be grateful for after moving to South Korea. 👉🏻

This carousel is a little reminder that sometimes the biggest gifts from a chapter of your life aren’t the ones you were looking for—they’re the ones you never saw coming.

These are just a few reflections from my time living abroad in Korea. What I didn’t expect were the things you can’t really plan for.

The quiet moments that slowly change you. The lessons you only learn by living somewhere unfamiliar. The parts of yourself you don’t discover until you’re far away from everything you’ve ever known.

If you’ve ever moved abroad, travelled solo, or taken a leap that scared you, I’d love to know:

💭 What’s something you’re grateful you gained that you never expected?

📌 If you’re thinking about working in Korea, I’ve got a free guide on my website about how I got my job in South Korea for your reference. 

#livingabroad #southkorea #seoul 

Prior to the move, I had quit university and was job searching for positions in South Korea.

I was pretty lucky to connect with some genuine people overseas. I've heard from others and online that making friends in Korea can be difficult. 

Before I left some of my coworkers gave me going away presents which I wasn't expecting at all. 

One of my coworkers even handwrote a heartfelt message on the gift.

Most of the time I'd spend my weekends exploring a different region or city. 

Random viewpoint I found when I did a weekend trip in Jeonju.

One of unexpected perks of my job was being invited to work excursions which meant I got to see some new places around Korea. 

Hard to pick a favourite season in Korea. It's probably a tie between autumn or spring. 

Before I moved I took online Korean lessons but the language barrier was still a bit of a shock. 

One of my favourite things to do alone was exploring either my local area or cafe hopping. 

Even everyday tasks were a bit more challenging with the language barrier. 

There's definitely a learning curve once you move to a new place. Just remember to be patient with yourself while you're adjusting.

A friend took this photo after we got dropped off at a hotel.  I promise you those are not
🙇🏻‍♀️ Part 14 of media to read in your twenties ✨ 🙇🏻‍♀️ Part 14 of media to read in your twenties ✨
Here’s your next round of long-form reads for navigating your twenties.

💌 Enjoyed this post? I share weekly media recommendations (books, films, articles, podcasts & more) in my newsletter—link in bio if you’d like to join.

💡 Want even more? Check out my full “media to consume instead of doom-scrolling” series on my profile.

💭 Want the links for these articles? Sign up for my newsletter for the full list of articles + essays featured here.

#twenties #whattoread #articles
  • Disclosure
  • Privacy Policy
  • Terms & Conditions

Copyright © 2026 Kelly Today · Theme by 17th Avenue