Editing is one of the most rewarding parts of photography, but it can also feel overwhelming when you’re just starting out. With endless sliders, tones, and adjustments in Lightroom, knowing where to begin isn’t always easy. That’s where Fujifilm Lightroom Presets come in.
Inspired by Fujifilm’s iconic film simulations, these presets give your photos a timeless, film-like aesthetic in just one click—whether you’re shooting travel, portraits, or everyday moments. The best part? They save you time while still leaving room for your own creative touch.
In this guide, I’ll walk you through how to install and use Fujifilm Lightroom Presets, along with practical editing tips to help you get the most out of them. Whether you’re new to photography or looking to refine your editing workflow, these steps will help you edit with confidence and achieve professional results.
Disclaimer: This post may contain affiliate links, which means I get a small commission if you make a purchase (at no extra cost to you). It’s one of the ways I can keep producing free resources and guides for my readers. Thank you for your support! Refer to the Disclosure Policy for more details.
Short on time?
Here are my top recommendations for photography:
✨ Edit smarter, not harder — speed up your workflow with my best-selling Fujifilm Lightroom Presets and give your photos a professional finish in just one click.
📸 Take your photography further — download my free 30+ page Photography Guide packed with exclusive tips, editing tricks, and practical advice to help you grow.
💡 Invest wisely in your gear — discover my go-to camera equipment that’s worth the money and has made the biggest difference in my photography.
💵 Earn cashback shopping online with your favourite brands through Shopback ($20 bonus when you sign up) or TopCashback ($50 bonus when you sign up)
How to Start Editing with Lightroom Presets
If you’re new to presets, here’s a simple step-by-step guide to installing and using them in Lightroom. These steps can be followed after you’ve downloaded your Lightroom presets.
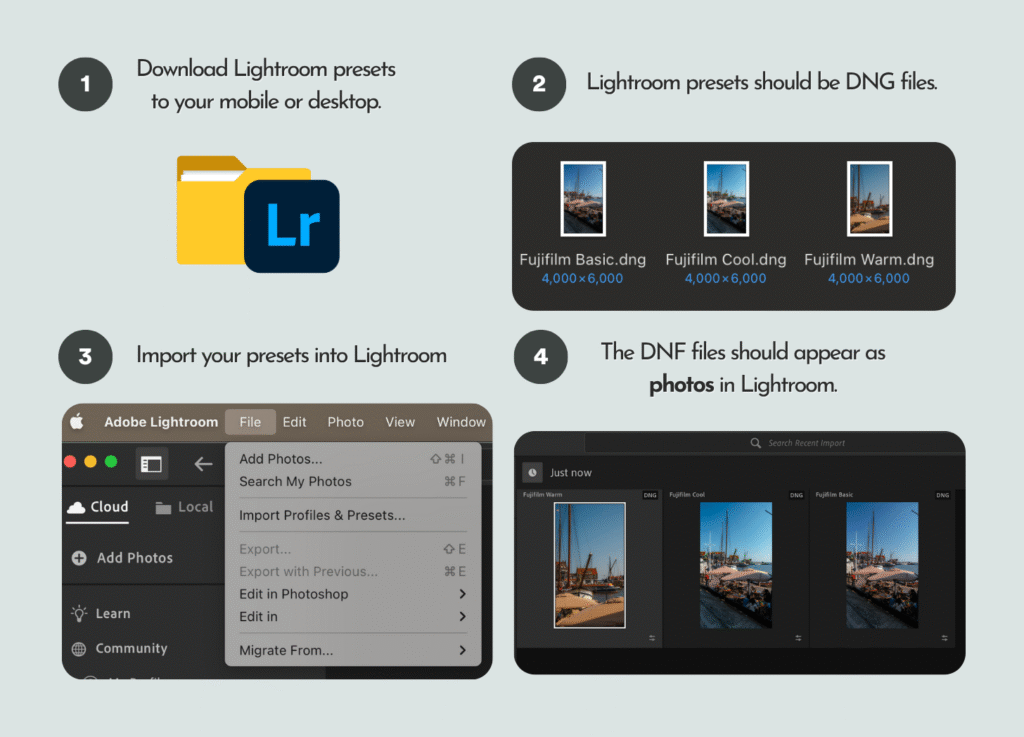
Download and Install Your Lightroom Presets
First, import your downloaded presets into Lightroom (desktop or mobile). The exact file format will depend on where you got them from. For example, the Fujifilm Lightroom Presets I’ve created come as DNG files, which can be imported directly into Lightroom as photos.
Tip: Adobe Lightroom is free on mobile, but a subscription is required for desktop use.
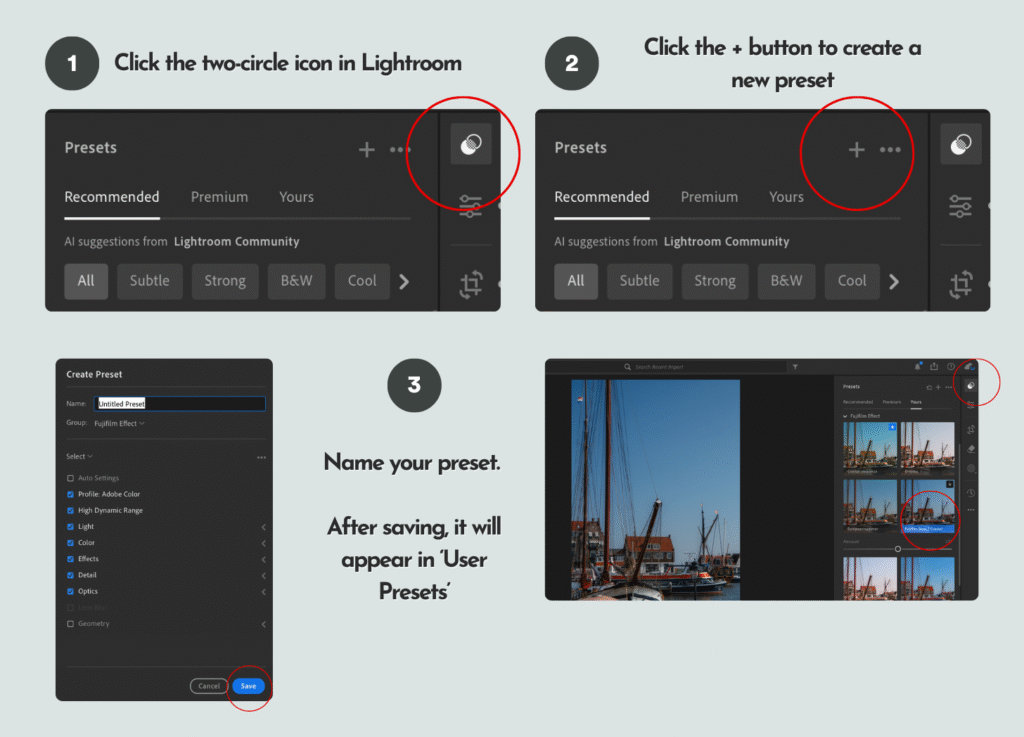
Create and Save Your Lightroom Presets
Once imported, the DNG files will appear in your Lightroom library as photos. Select one, then tap the two-circle “Presets” icon at the top right. Hit the + button to create a new preset, and give it a name (e.g., “Fujifilm Basic” or use the suggested names provided). After saving, it will appear under the User Presets section. Repeat this for each DNG file to save all your presets.
Import Your Photos in Lightroom
Next, import the photos you want to edit into Lightroom either on your mobile or desktop. To stay organised, create albums or folders (e.g., portraits, landscapes, or trip name) so you can easily find your photos for later.
Choose the Photo You Want to Edit
For best results, use RAW files since they hold more image data. If you’re using JPEG or PNG photos from your phone or camera, choose ones that are well-lit and naturally exposed—these work best with Lightroom presets.


📸 Ready to take your photography to the next level? Whether you’re just starting out or looking to sharpen your skills, my free 30-page photography guide is packed with practical tips, editing tricks, and step-by-step advice to help you grow as a photographer.
Apply the Fujifilm Lightroom Presets
Once you’ve selected a photo, tap the Presets icon and choose the one you saved earlier under “User Presets.” Apply it in one click to transform your photo.
If you’re using my Fujifilm Lightroom Presets, they’re especially effective for natural light shots, travel photography, and portraits where you want warmth, depth, and that signature film-like feel.
Top Tips for Editing with Lightroom Presets
Getting the most out of your Lightroom Presets is all about knowing how to fine-tune them for your photos. Presets give you a strong starting point, but a little extra adjustment will make your edits look polished and natural. Here are some top tips to help you edit like a pro:
Shooting in RAW
If your camera allows it, always shoot in RAW format. RAW files contain much more image data compared to JPEGs, which gives you far greater flexibility when applying presets. This means you’ll have more control over colours, shadows, and highlights—ensuring your Fujifilm presets look their best.

Adjust Exposure First
Exposure should always be your first stop. Even the best preset won’t look right if your photo is too dark or overexposed. Move the exposure slider until your photo feels balanced and natural, then continue making other adjustments. This simple step often makes a huge difference.
Adjust the Temperature
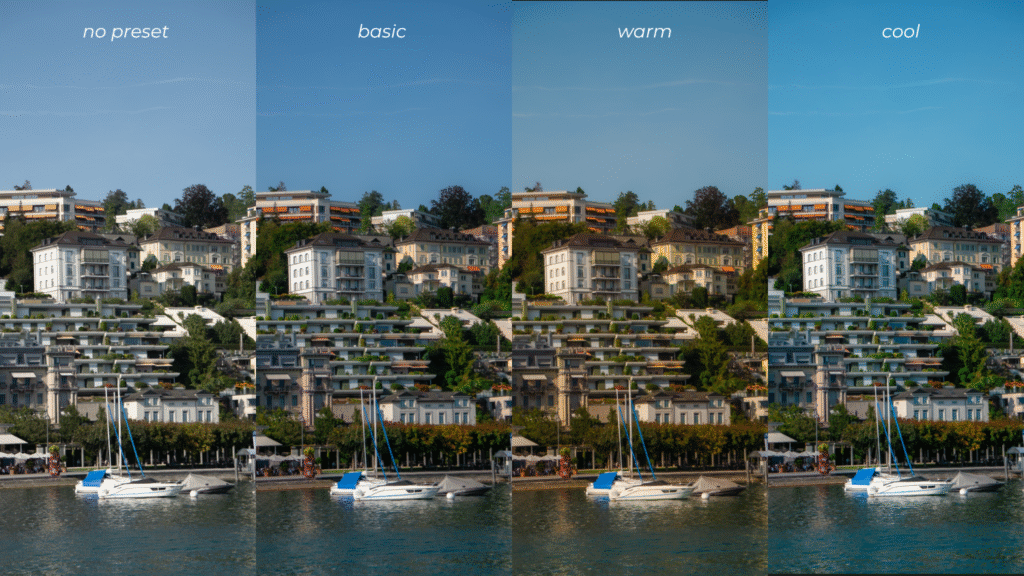
One of the hallmarks of Fujifilm’s film look is its warm, nostalgic tones. Try shifting the temperature slider slightly warmer to enhance this effect. On the other hand, cooler tones can create a moody, cinematic feel—perfect if you’re experimenting with different atmospheres in your photography.
Batch Edit for Consistency
Add Your Personal Touch
If you’re editing a full set of photos—like from a trip, event, or portrait shoot—save time by batch editing. Apply your chosen Fujifilm preset to one photo, then sync the edits across multiple images. This not only speeds up your workflow but also gives your gallery a cohesive and professional look.
Presets are designed as a foundation, but the magic happens when you make them your own. Don’t be afraid to fine-tune saturation, contrast, or clarity to suit your style. Want a more vintage vibe? Add a touch of grain. Prefer modern and clean? Pull back on shadows and clarity. These subtle adjustments help your edits stand out and reflect your unique eye as a photographer.
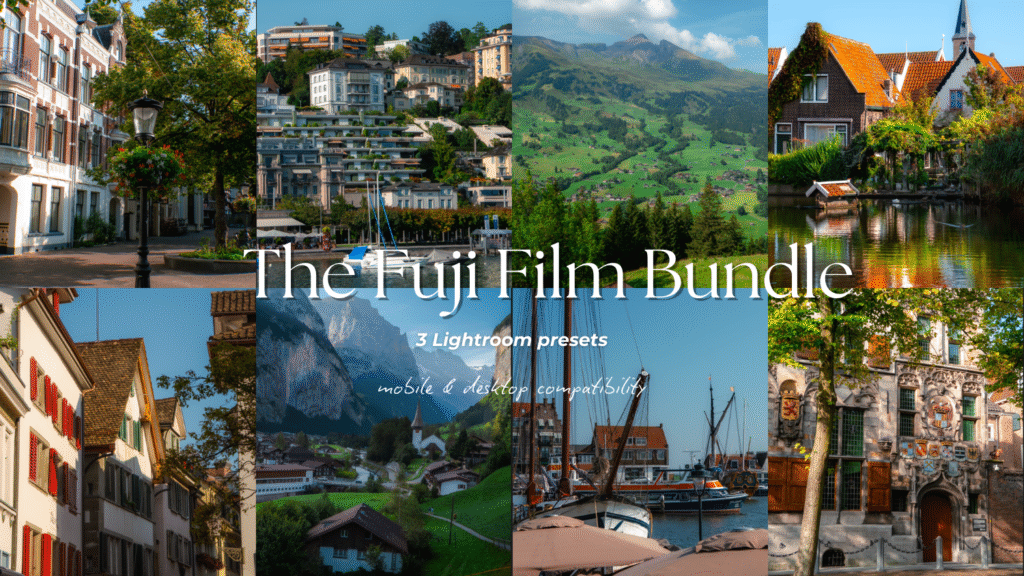
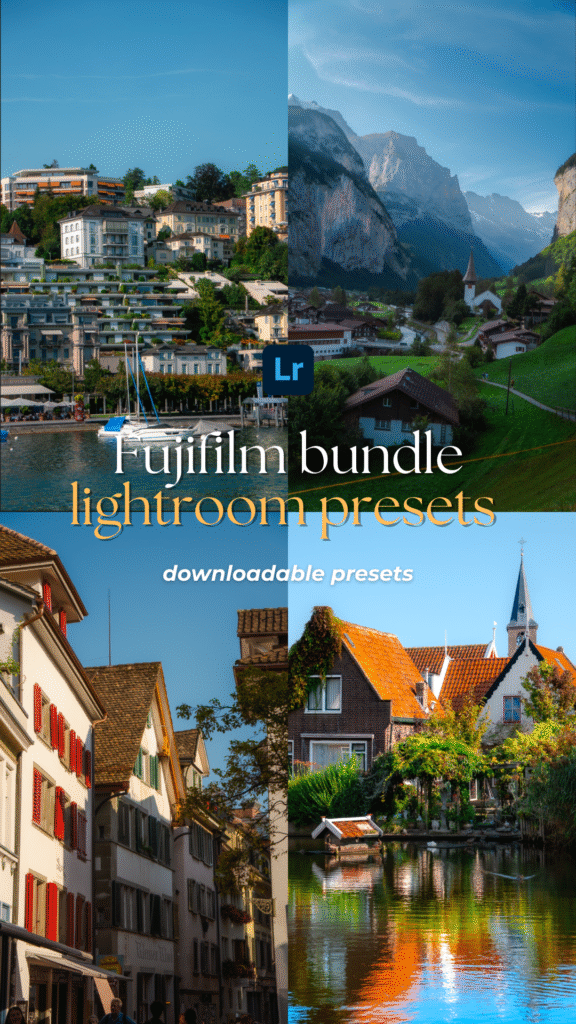
Sample Photos Using Fujifilm Lightroom Presets
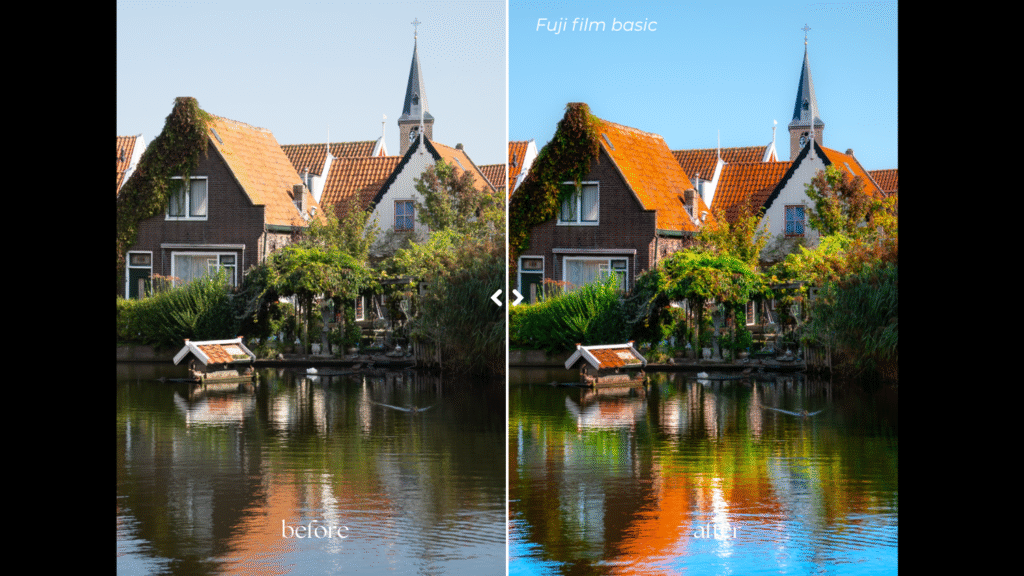
Here are a few sample photos edited with my Fujifilm Lightroom Preset Bundle. This bundle includes three presets—Basic, Warm, and Cool—crafted to emulate the signature Fujifilm look and adjust beautifully to different lighting conditions throughout the day.
The first photo was edited using the Fujifilm Basic Preset, which you can download individually or as part of the full bundle. This preset gives your photos a clean, true-to-life finish while enhancing colours in a way that reflects Fujifilm’s timeless tones.
The next photo was edited with the Fujifilm Warm Preset, designed to bring out rich natural colours and amplify the glow of sunlight, perfect for those golden midday shots or during golden hour.
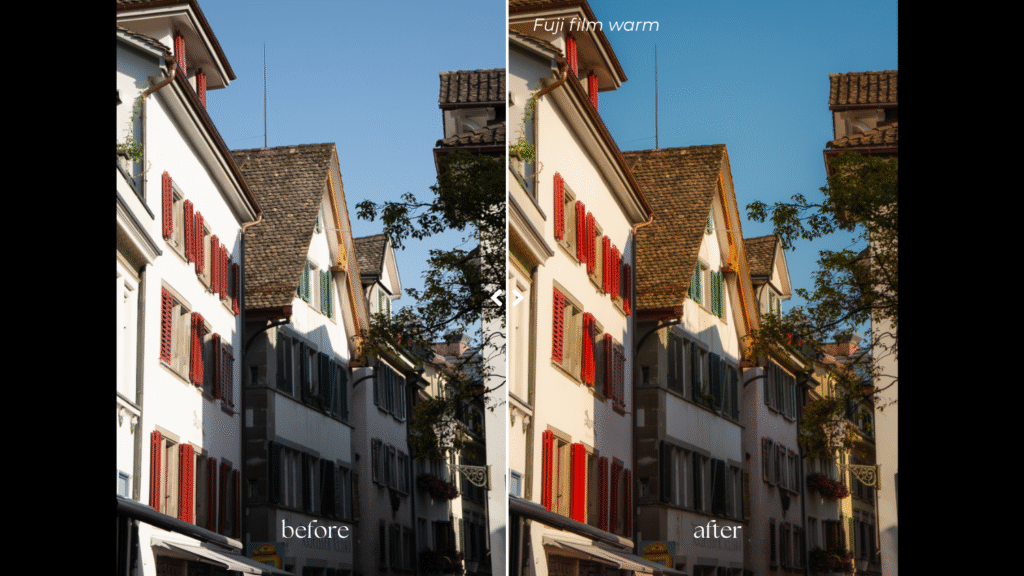
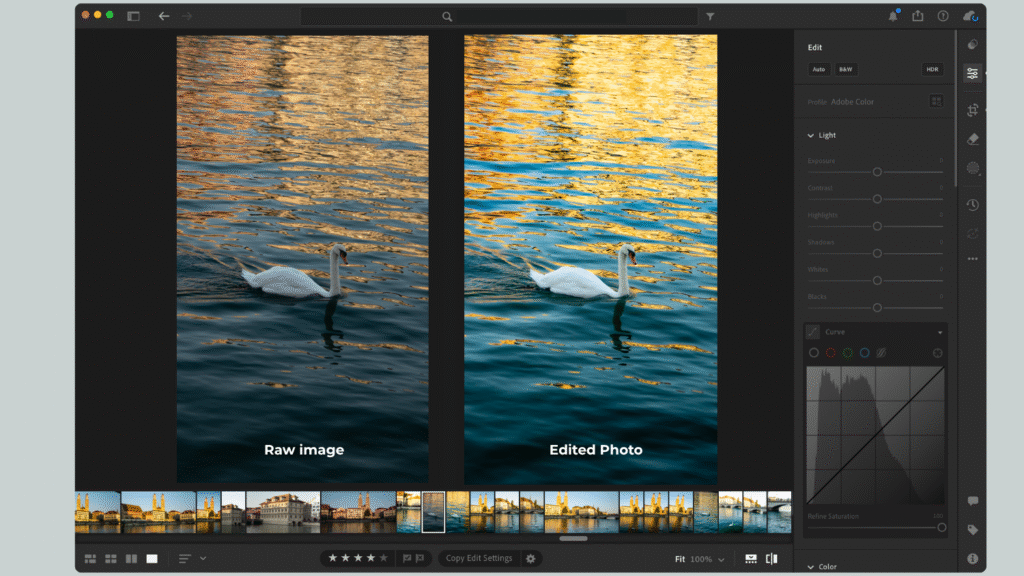
Finally, here’s a side-by-side comparison of an unedited RAW image and the same photo transformed using all three Fujifilm Lightroom presets—showing just how effortlessly they capture that iconic Fujifilm aesthetic.
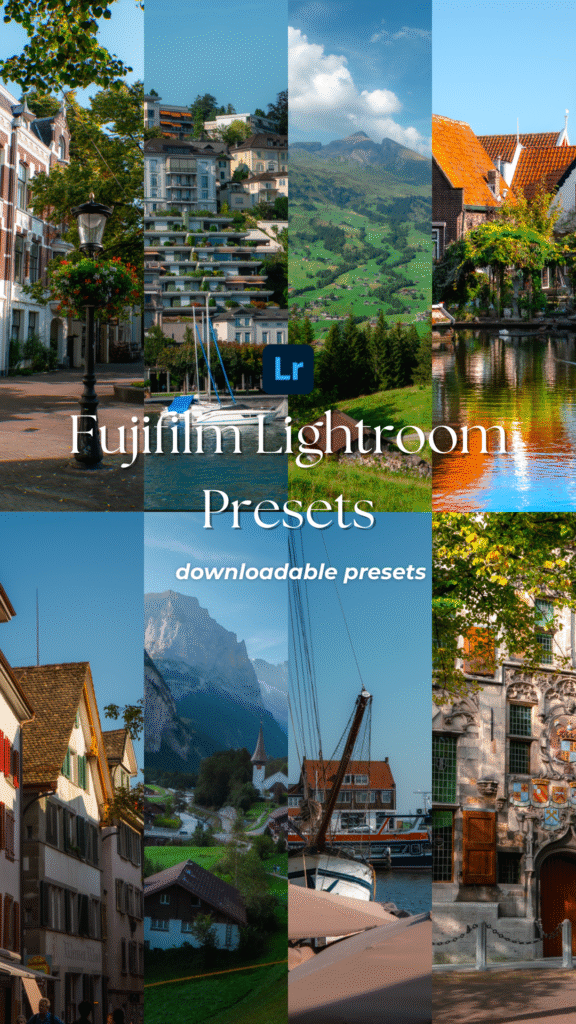
Download Fujifilm Lightroom Presets
If you love the look of these edits, you can easily achieve the same results in your own photos by downloading the Fujifilm Lightroom Preset Bundle. Whether you’re capturing landscapes, portraits, or everyday moments, these presets make it simple to add that classic Fujifilm vibe to every shot—saving you time while making your images pop.
Unlock 10% off my digital products when you sign up for my newsletter.
Other Resources You Might Find Helpful
- Ultimate Female Travel Essentials List for International Travel
- How to Take Photos of Yourself as a Female Solo Traveller
- My Travel Photography Gear I Never Leave the House Without
Helpful Resources for You
✨ Edit smarter, not harder — speed up your workflow with my best-selling Fujifilm Lightroom Presets and give your photos a professional finish in just one click.
📸 Take your photography further — download my free 30+ page Photography Guide packed with exclusive tips, editing tricks, and practical advice to help you grow.
💡 Invest wisely in your gear — discover my go-to camera equipment that’s genuinely worth the money and has made the biggest difference in my photography.
💵 Earn cashback shopping online with your favourite brands through Shopback ($20 bonus when you sign up) or TopCashback ($50 bonus when you sign up)
Found this helpful? 👇🏼
Support my work by buying me a coffee so I can produce more free content for you.
📌 Click on the pin to save ‘Fujifilm Lightroom Presets‘ for later.


Leave a Reply
You must be logged in to post a comment.